- Beranda
- The Lounge
Cara Memperbaiki/Mengganti Battery iPhone mu
...
TS
...admin...1
Cara Memperbaiki/Mengganti Battery iPhone mu
Semoga Tidak Repost
Bingung Sama iPhone mu yang pengen ganti battery baru atau segalanya lah ini ada tutorialnya
Spoiler for 1:
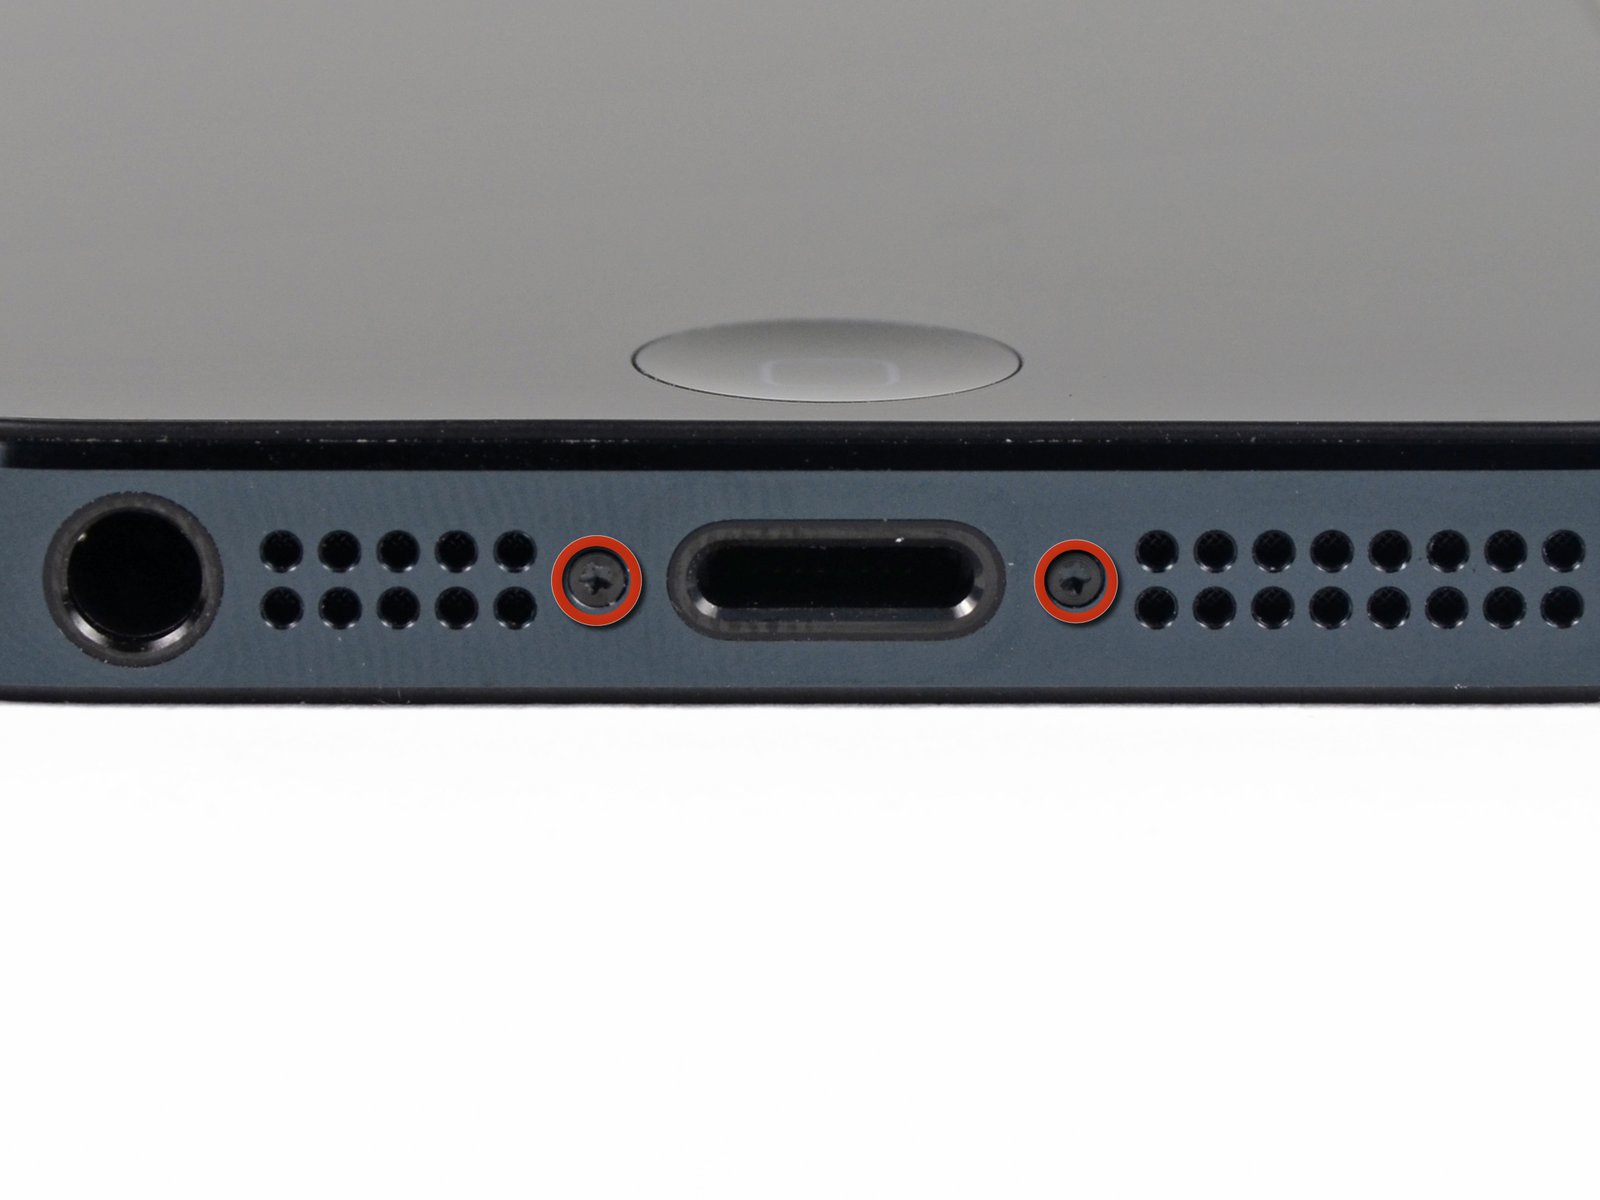
Before disassembling your iPhone, be sure it is powered off.
Remove the two 3.6 mm Pentalobe screws next to the Lightning connector
Spoiler for 2:
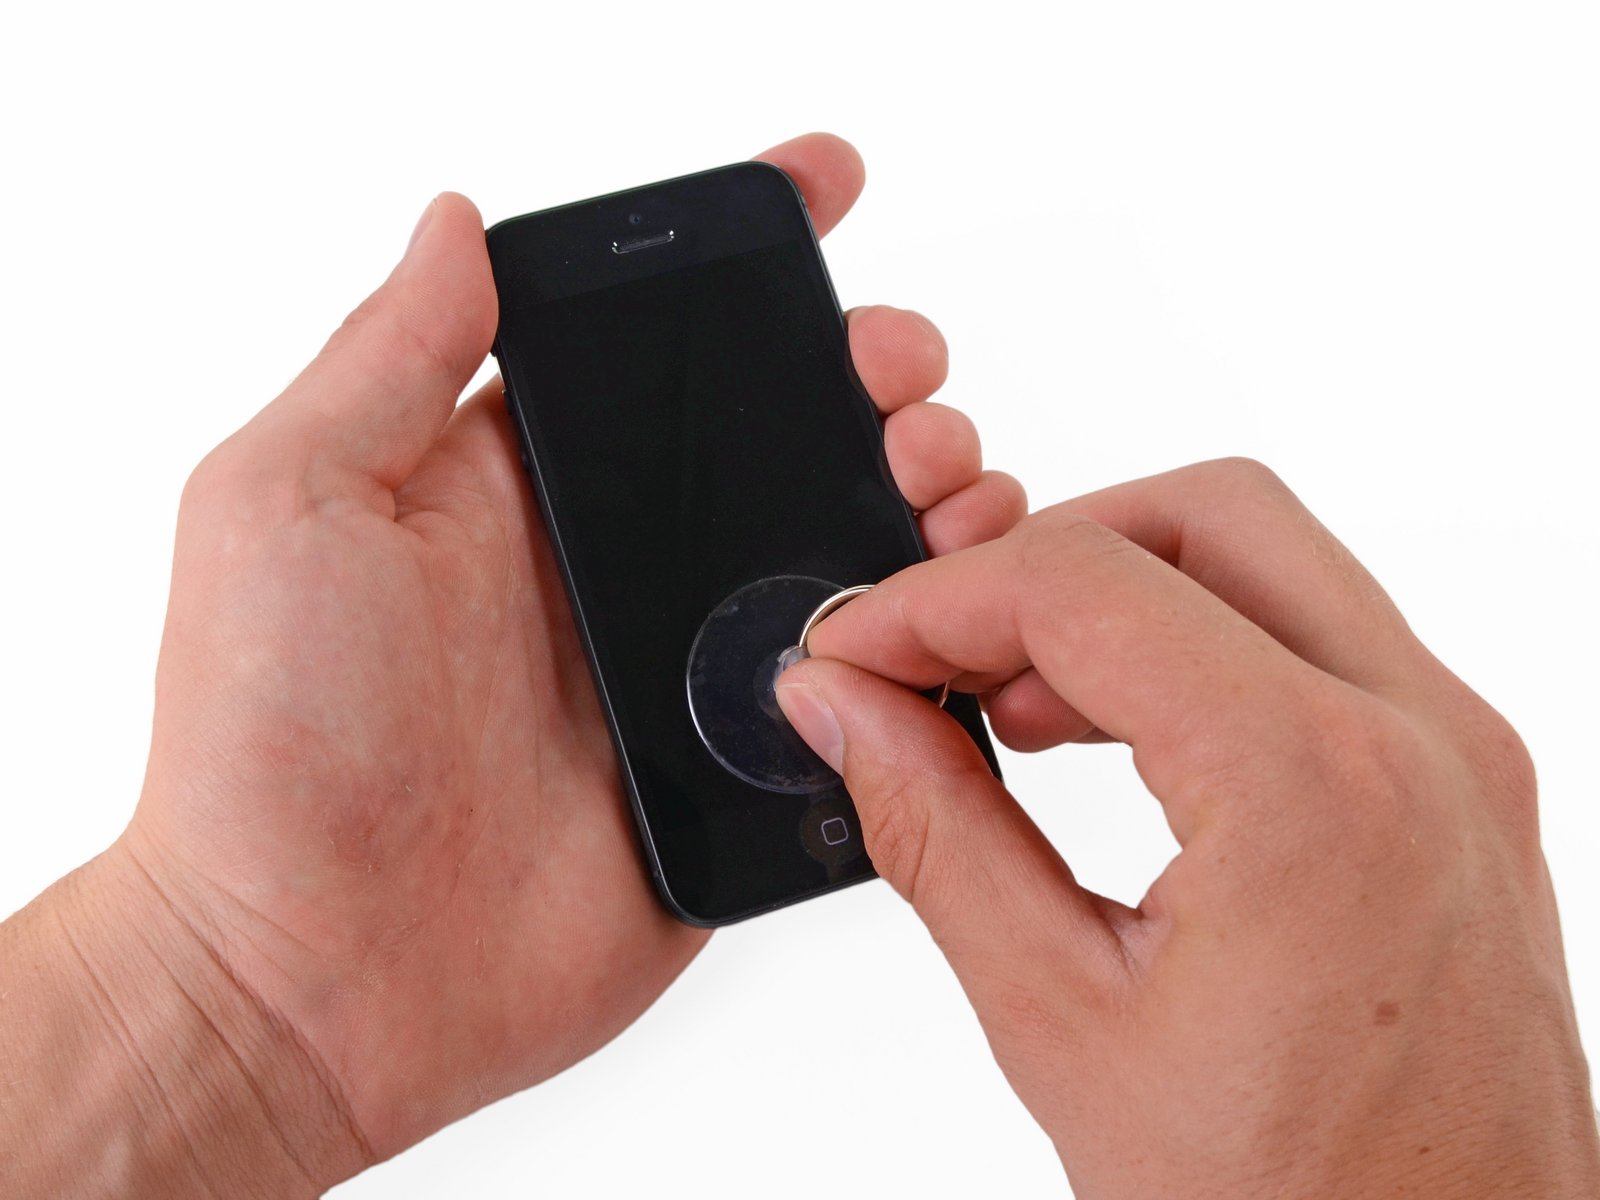
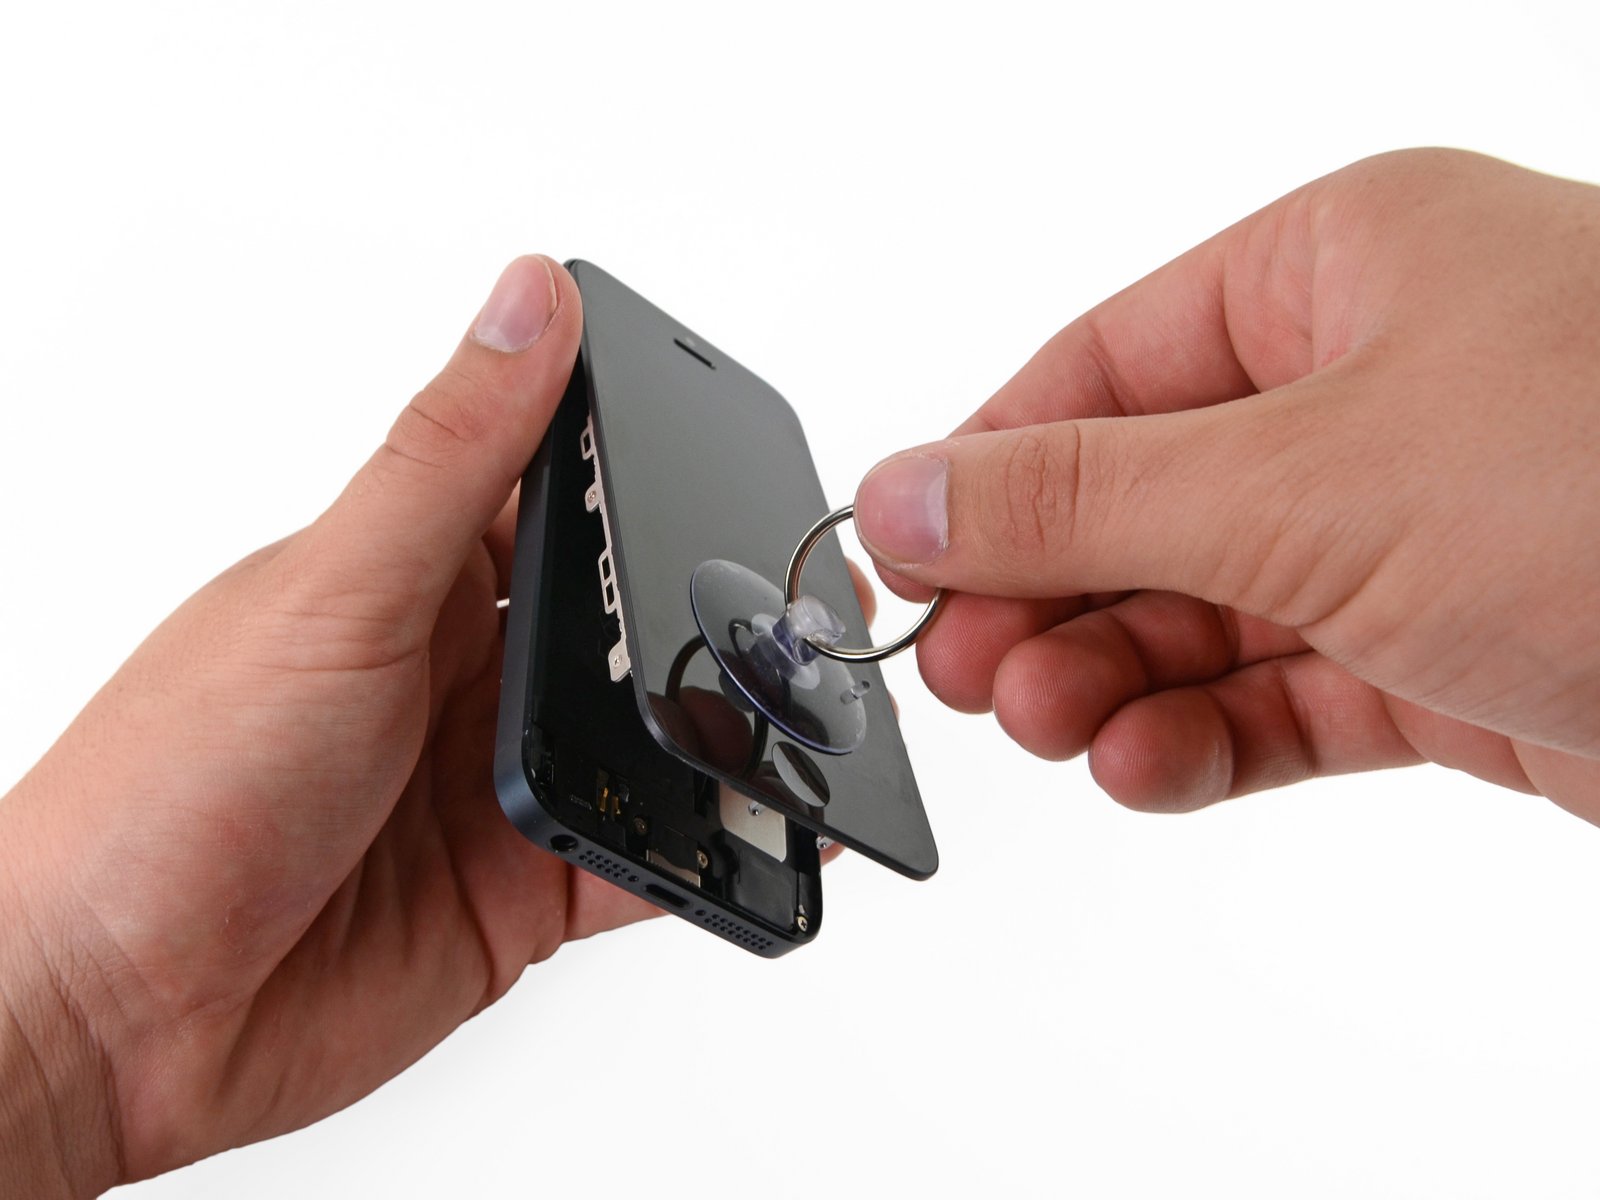
Press a suction cup onto the screen, just above the home button.
Be sure the cup is completely on the screen to get a tight seal.
Spoiler for 3:
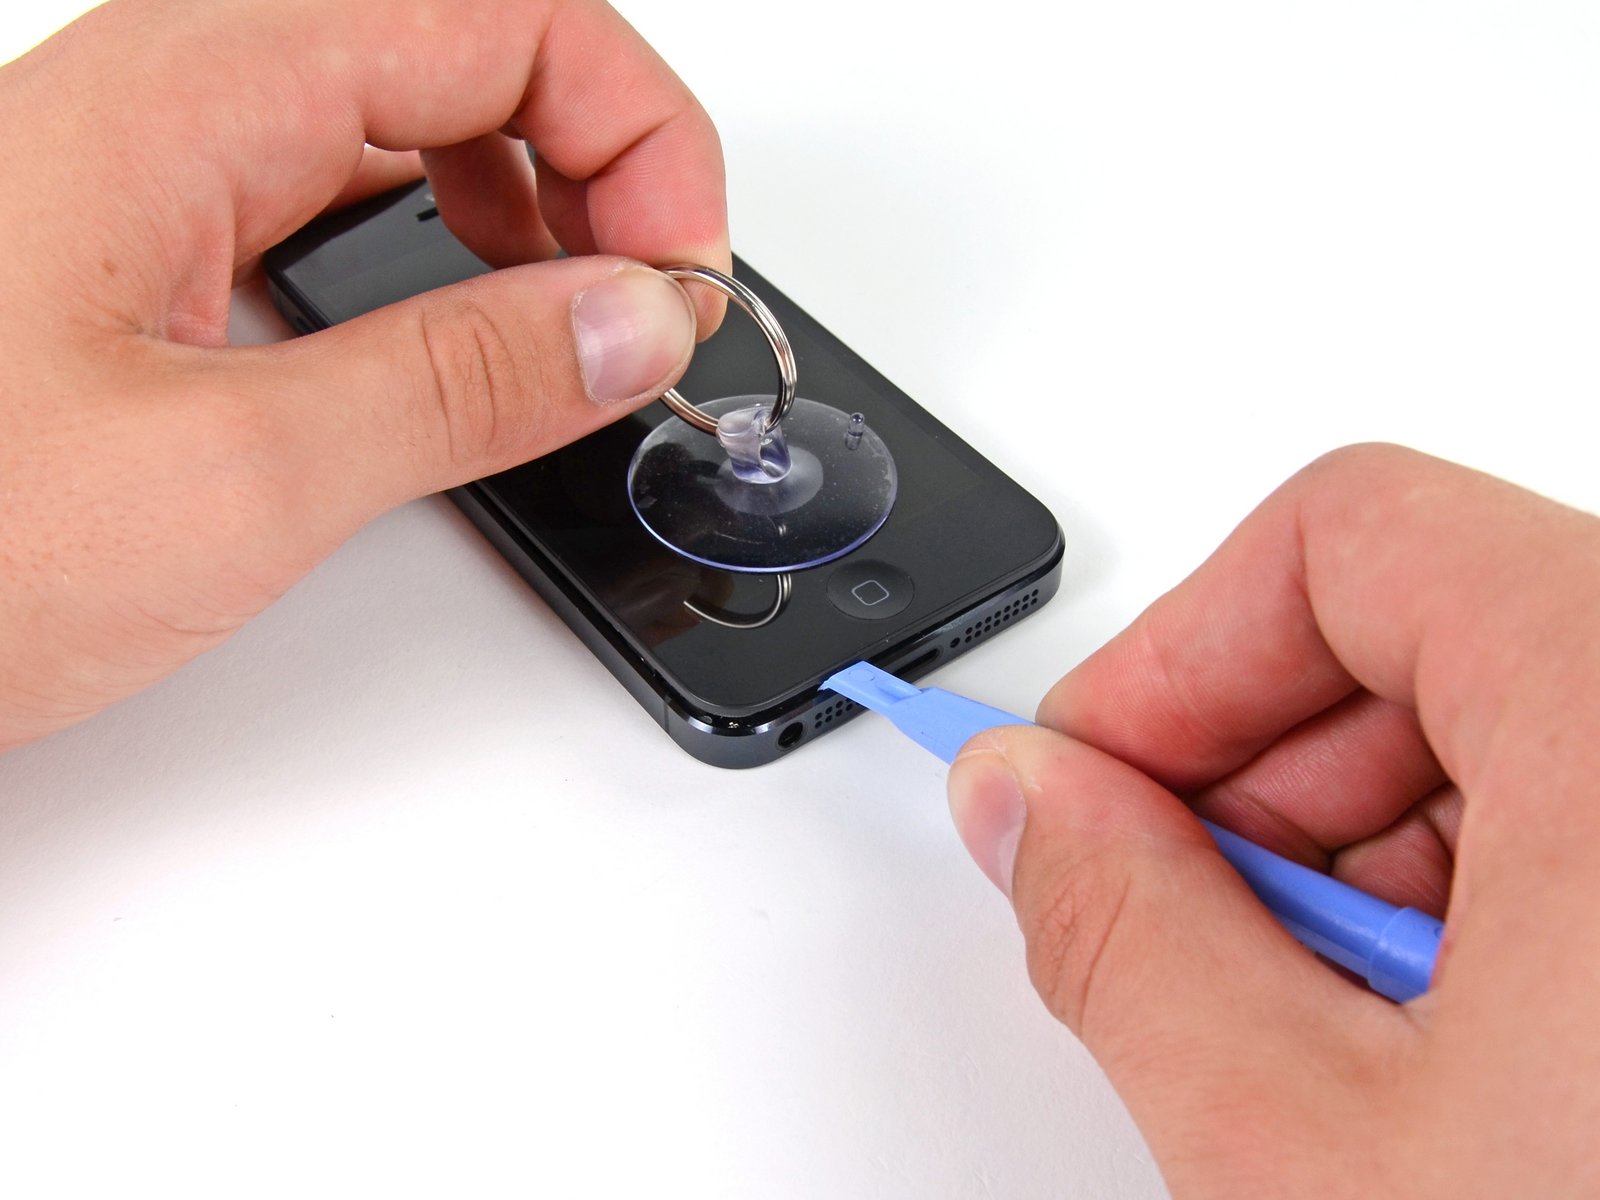
Make sure the suction cup is firmly attached to the front panel assembly.
While holding the iPhone down with one hand, pull up on the suction cup to slightly separate the front panel assembly from the rear case.
Take your time and apply firm, constant force. The display assembly is a much tighter fit than most devices.
With a plastic opening tool, begin to gently pry the rear case down, away from the display assembly, while you pull up with the suction cup.
There are several clips attaching the front panel assembly to the rear case, so you may need to use a combination of the suction cup and plastic opening tool to free the front panel assembly.
Spoiler for 4:
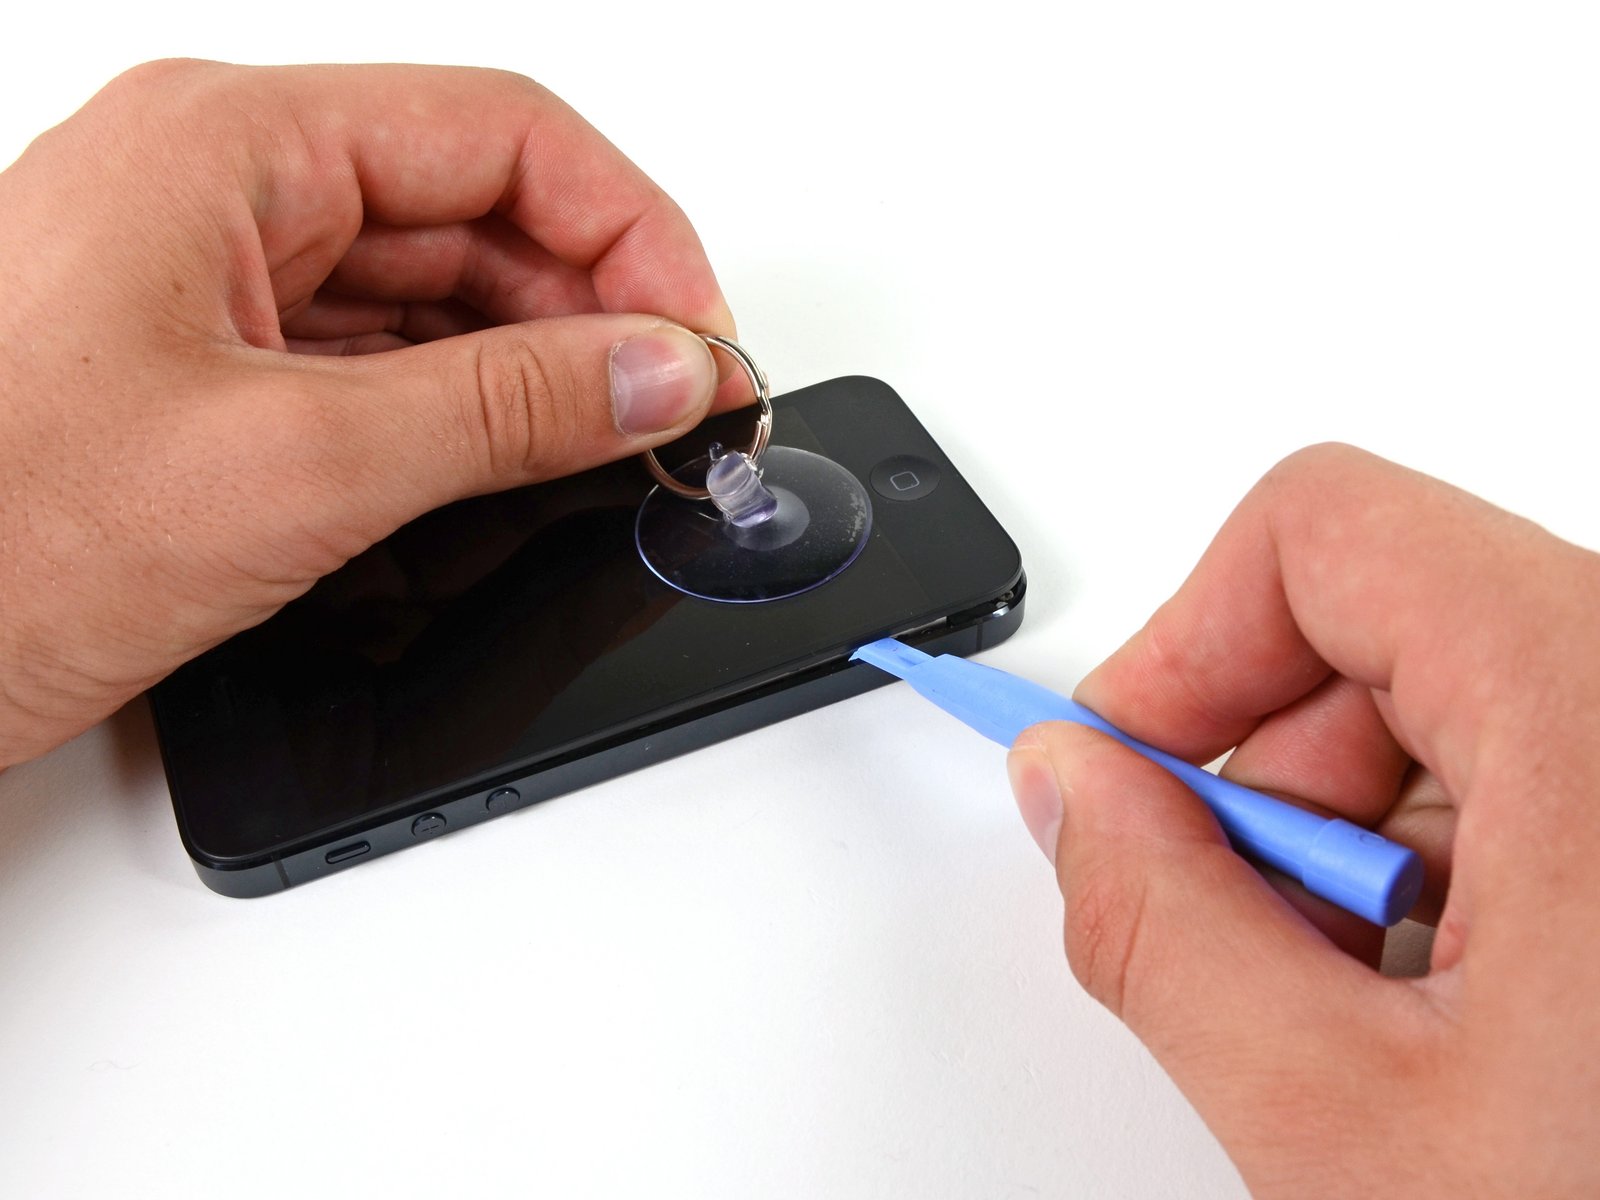
Continue to pry up around the sides of the front panel assembly, detaching the clips along the left and right side.
Spoiler for 5:
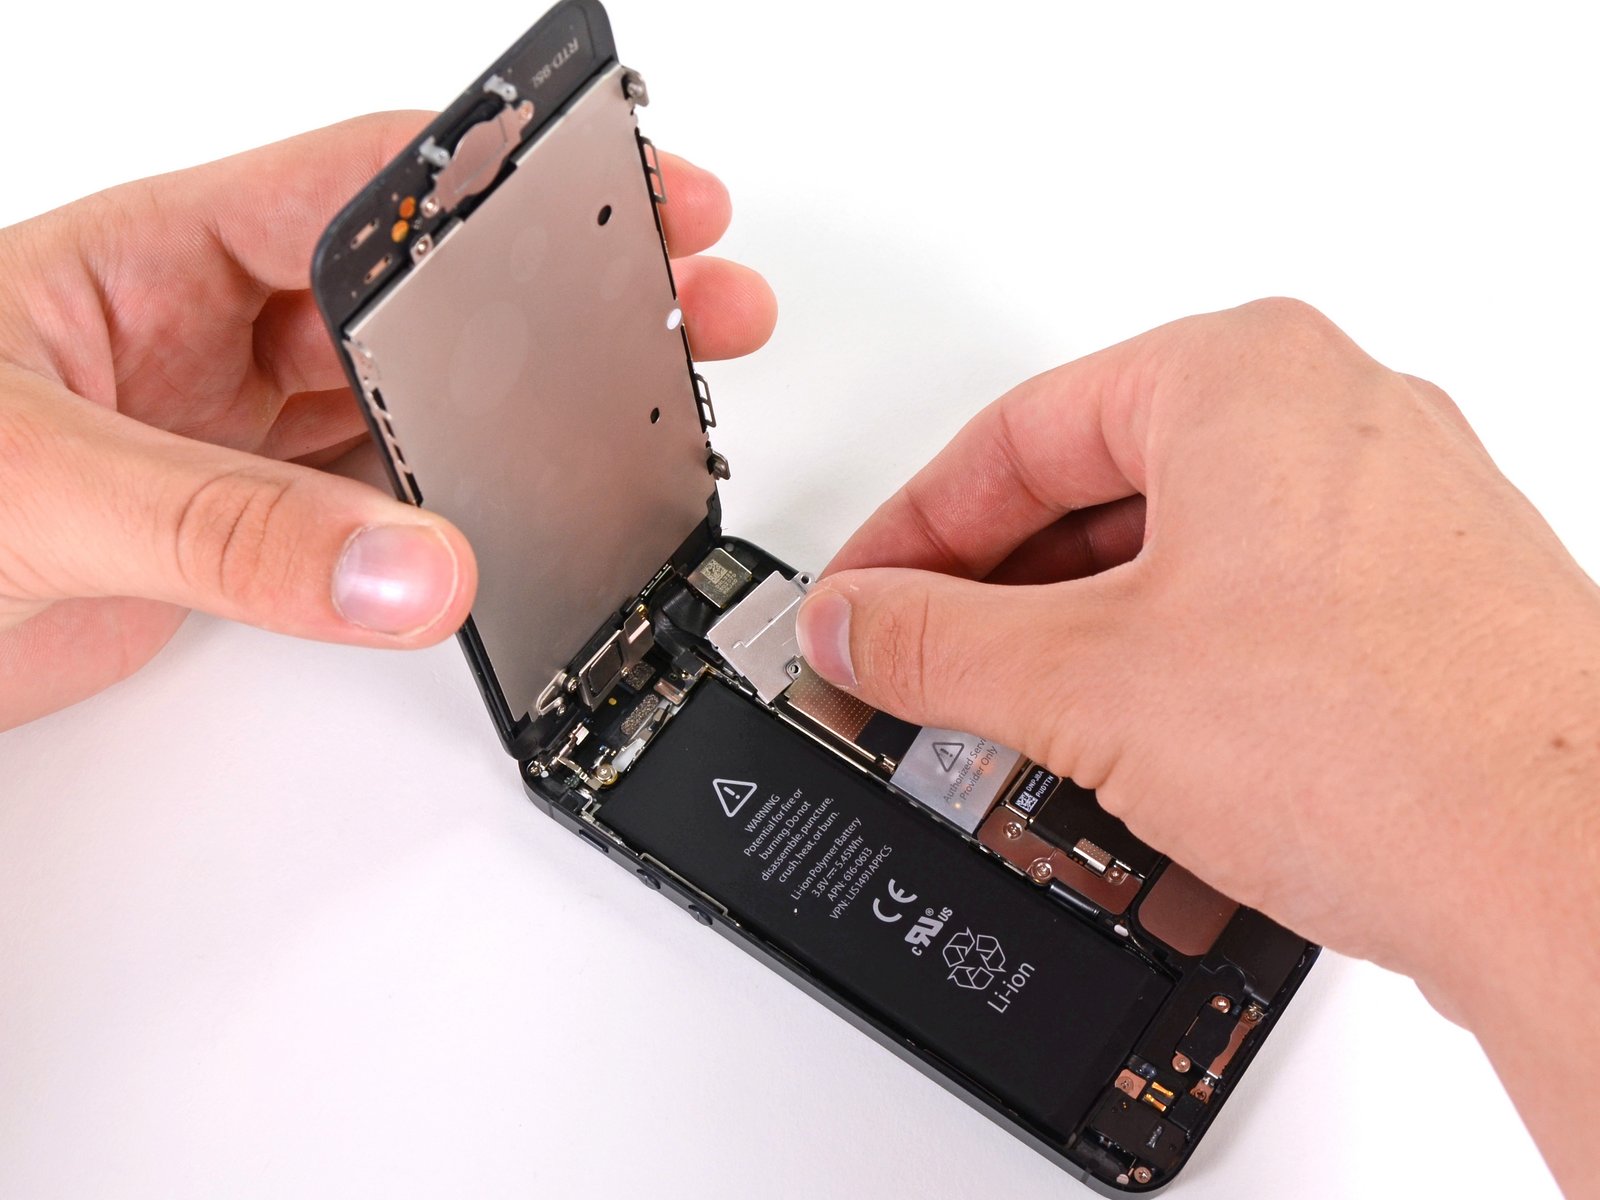
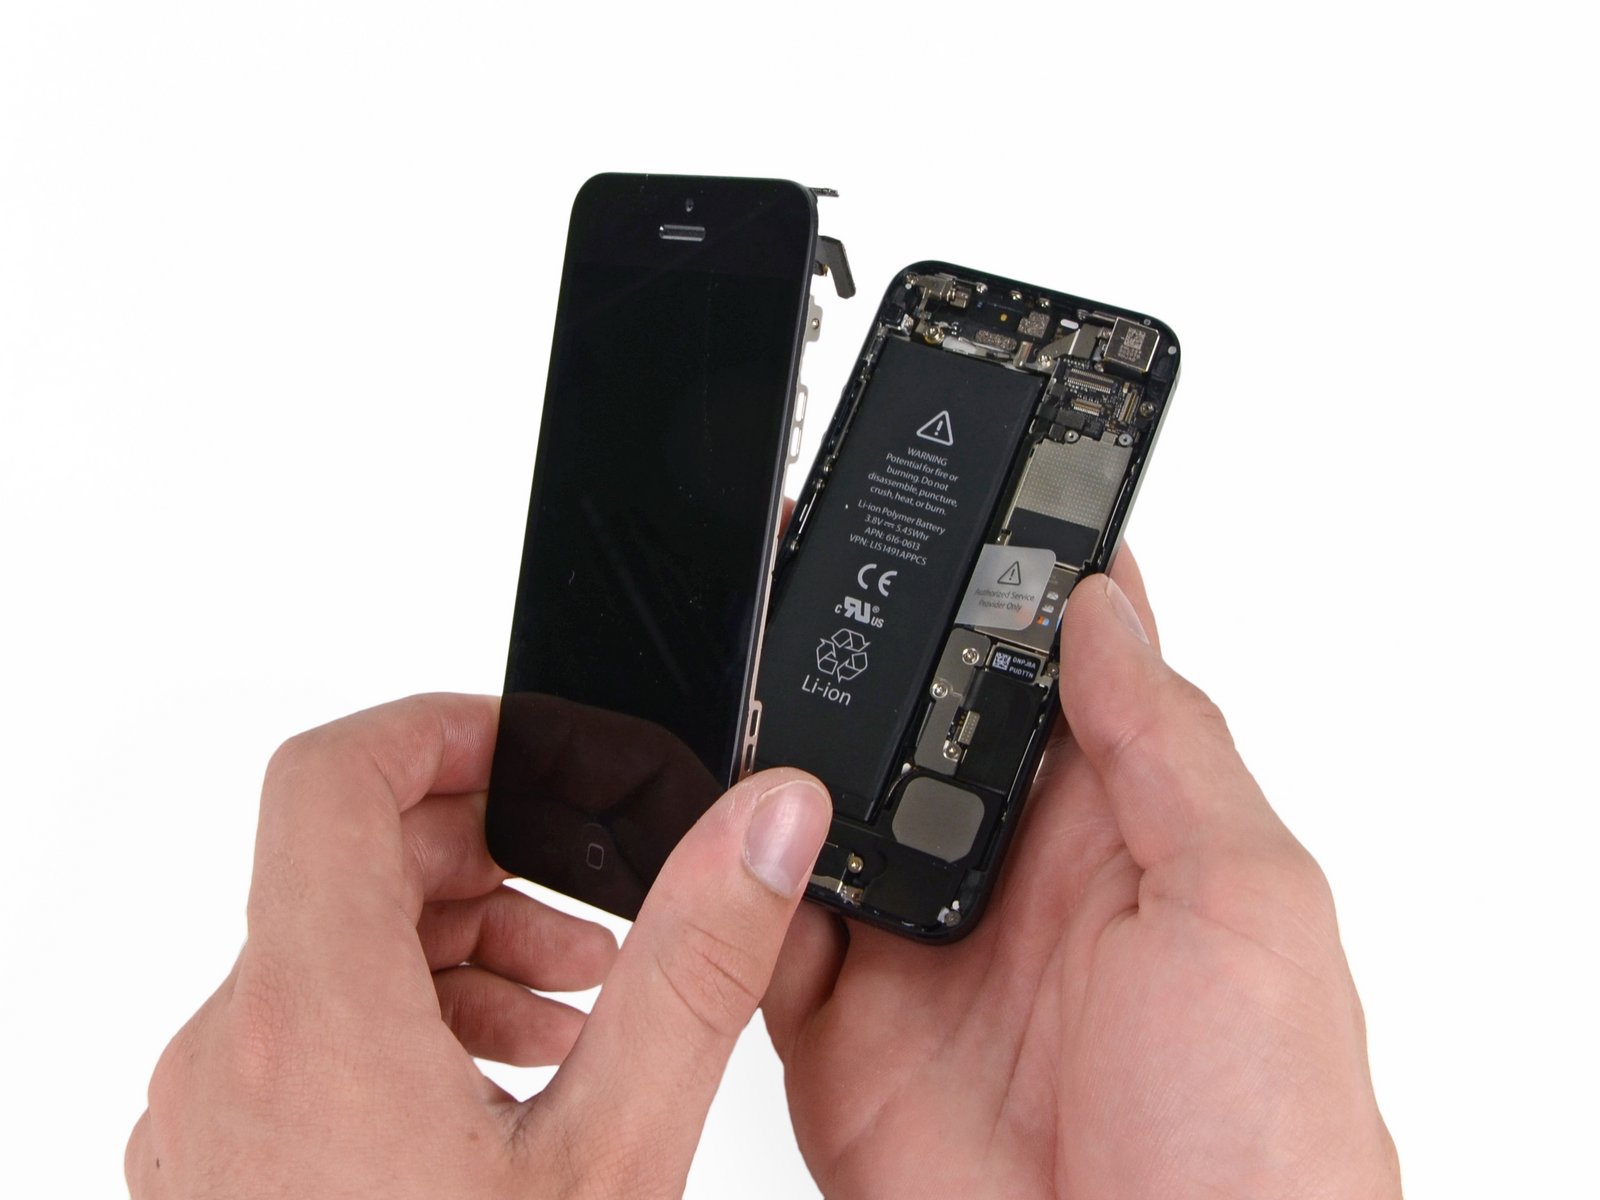
Do not try to completely remove the front panel assembly from the rear case, as there are several ribbon cables still attached at the top of the iPhone.
Once the clips have been released on the bottom and sides of the front panel assembly, pull the bottom of the assembly away from the rear case.
Lift the front panel assembly slowly up to about 90 degrees from the rear case.
Spoiler for 6:
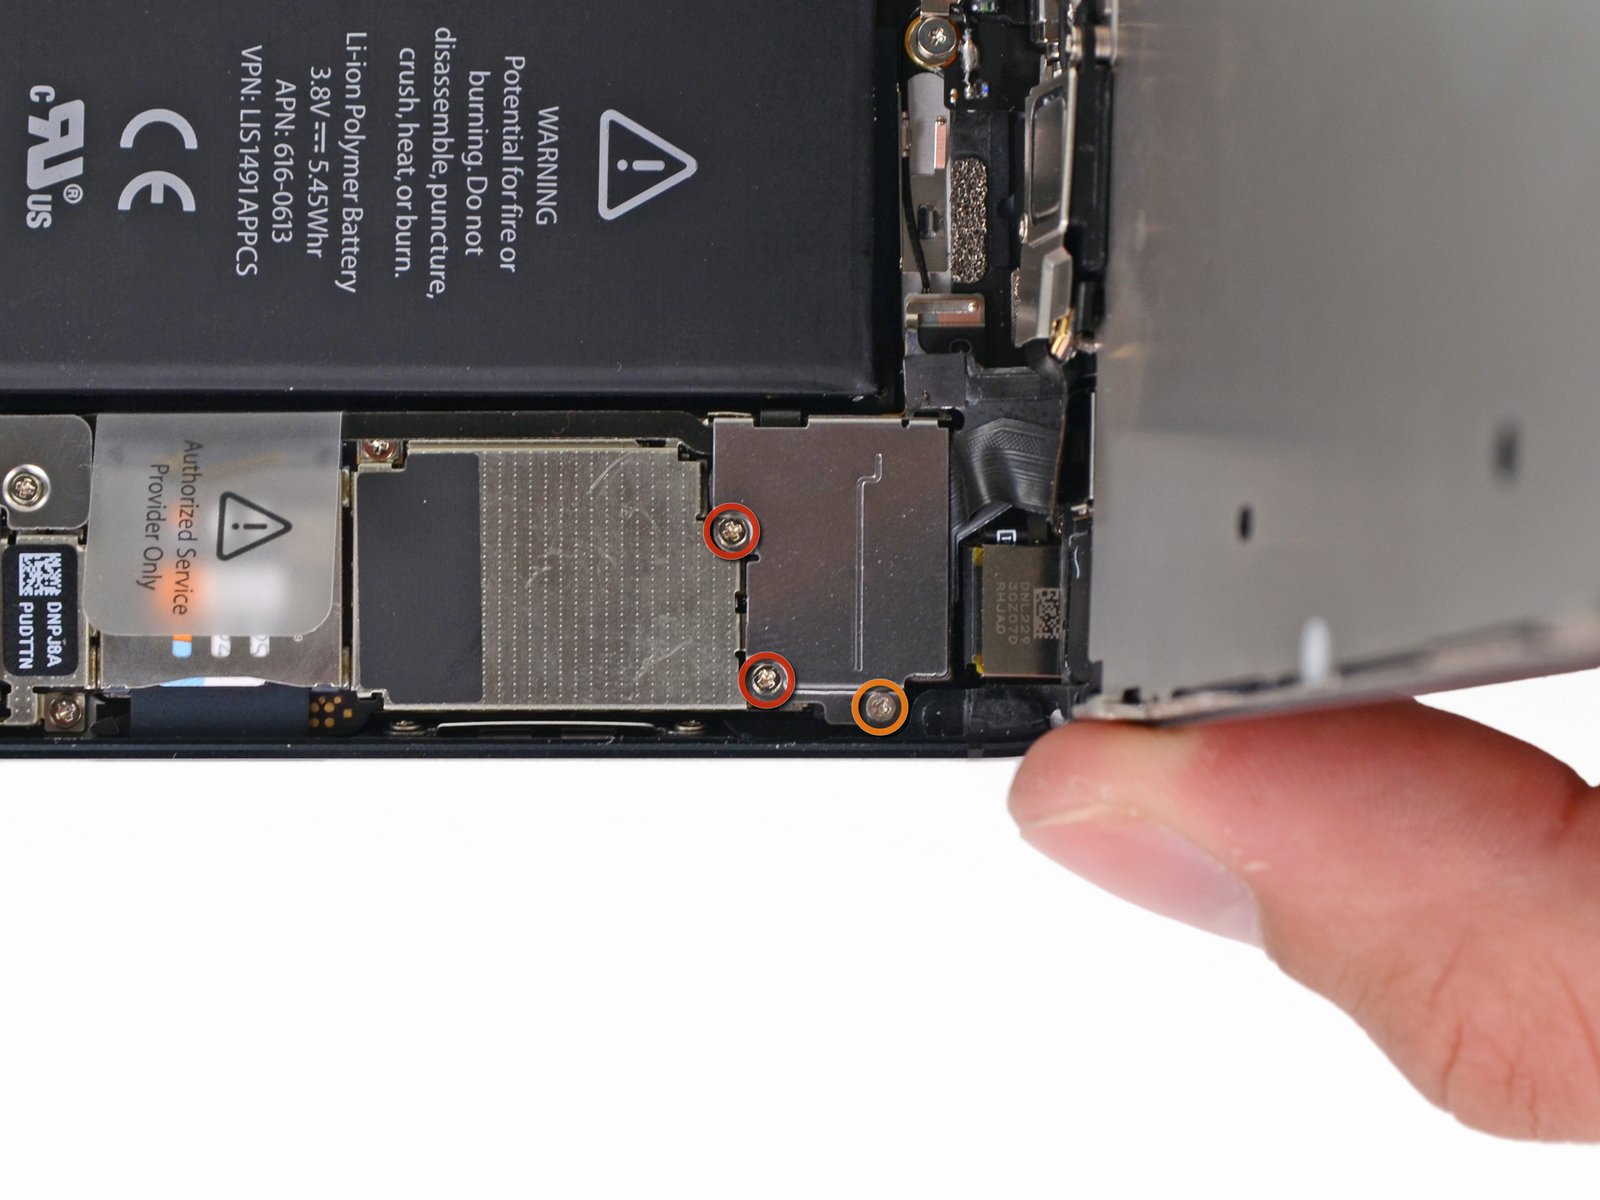
Remove the following screws securing the front panel assembly cable bracket to the logic board:
Two 1.2 mm Phillips screws
One 1.6 mm Phillips screw
Spoiler for 7:
Remove the front panel assembly cable bracket from the logic board.
Spoiler for 8:
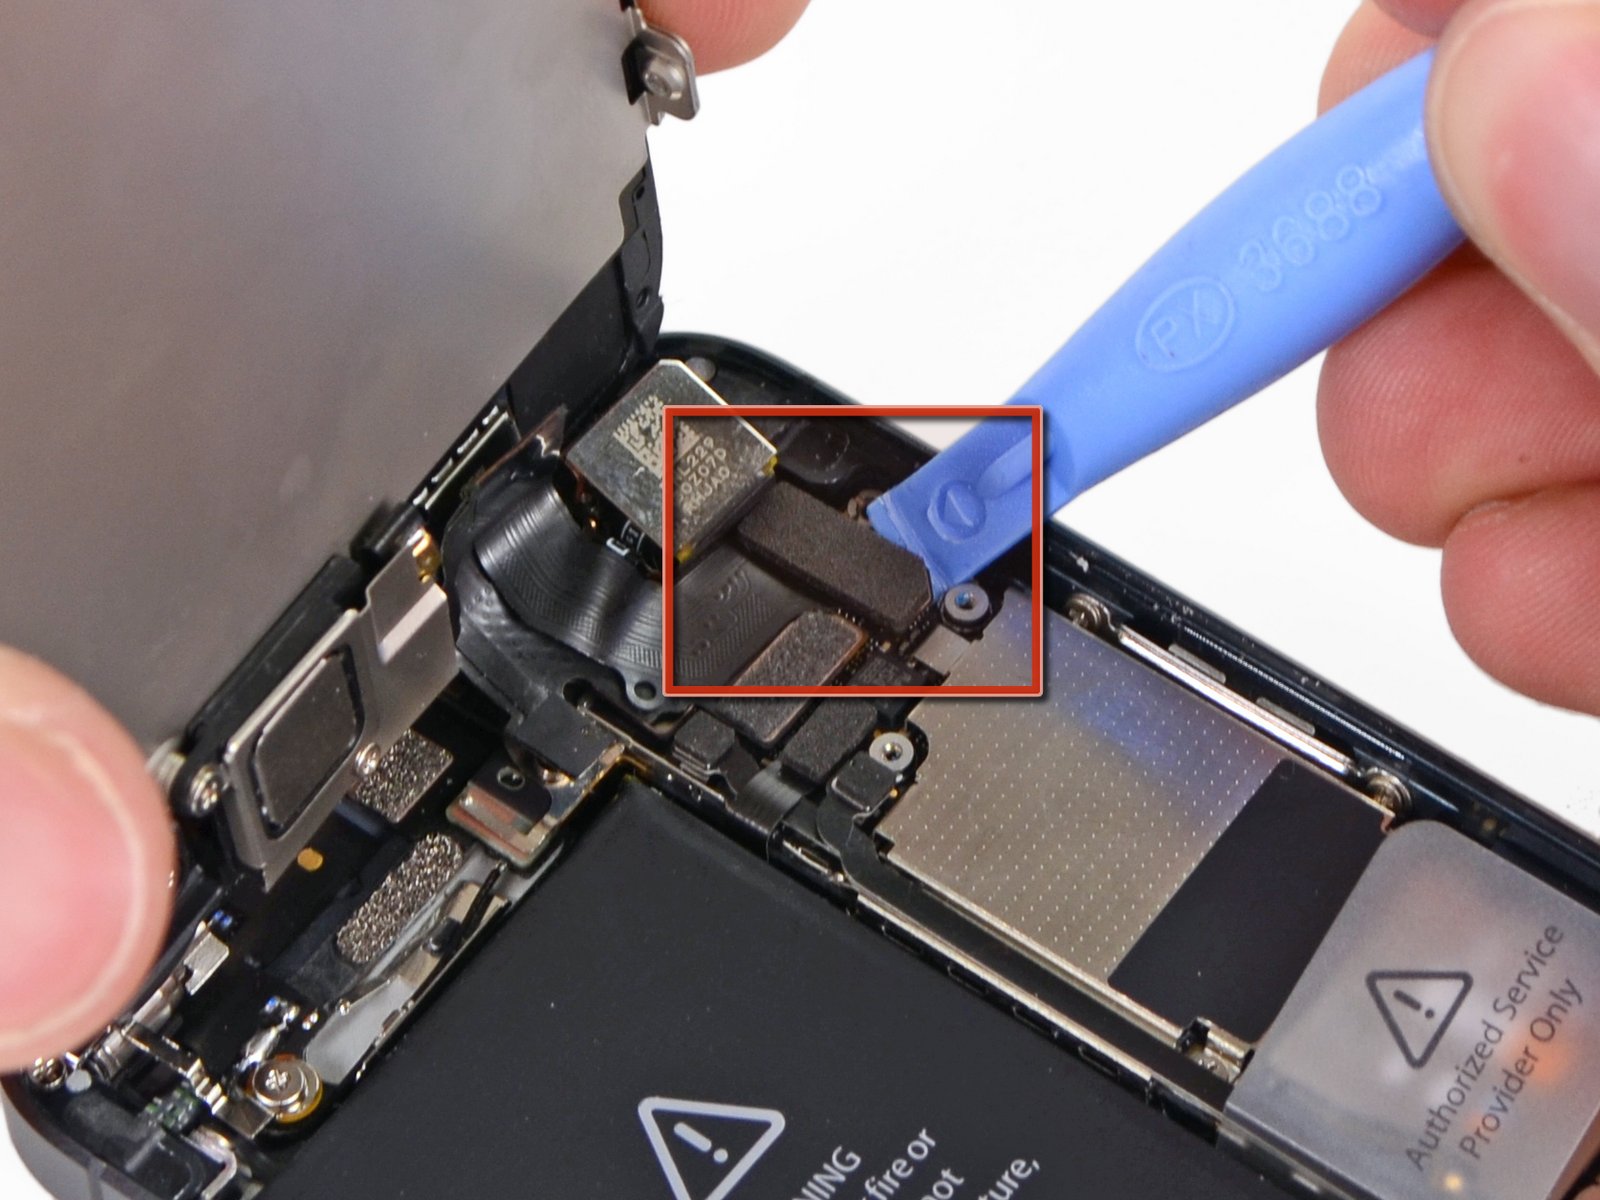 Use a plastic opening tool to disconnect the three front panel assembly cables:
Front-facing camera and sensor cable
Digitizer cable
LCD cable
When reassembling your phone, The LCD cable may pop off the connector. This can cause white lines, or nothing at all to appear when powering your phone back on. If that happens, simply reconnect the cable and power cycle your phone. The best way to power cycle your phone is to disconnect and reconnect the battery.
Spoiler for 9:
 Remove the front panel assembly from the rear case.
Spoiler for 10:
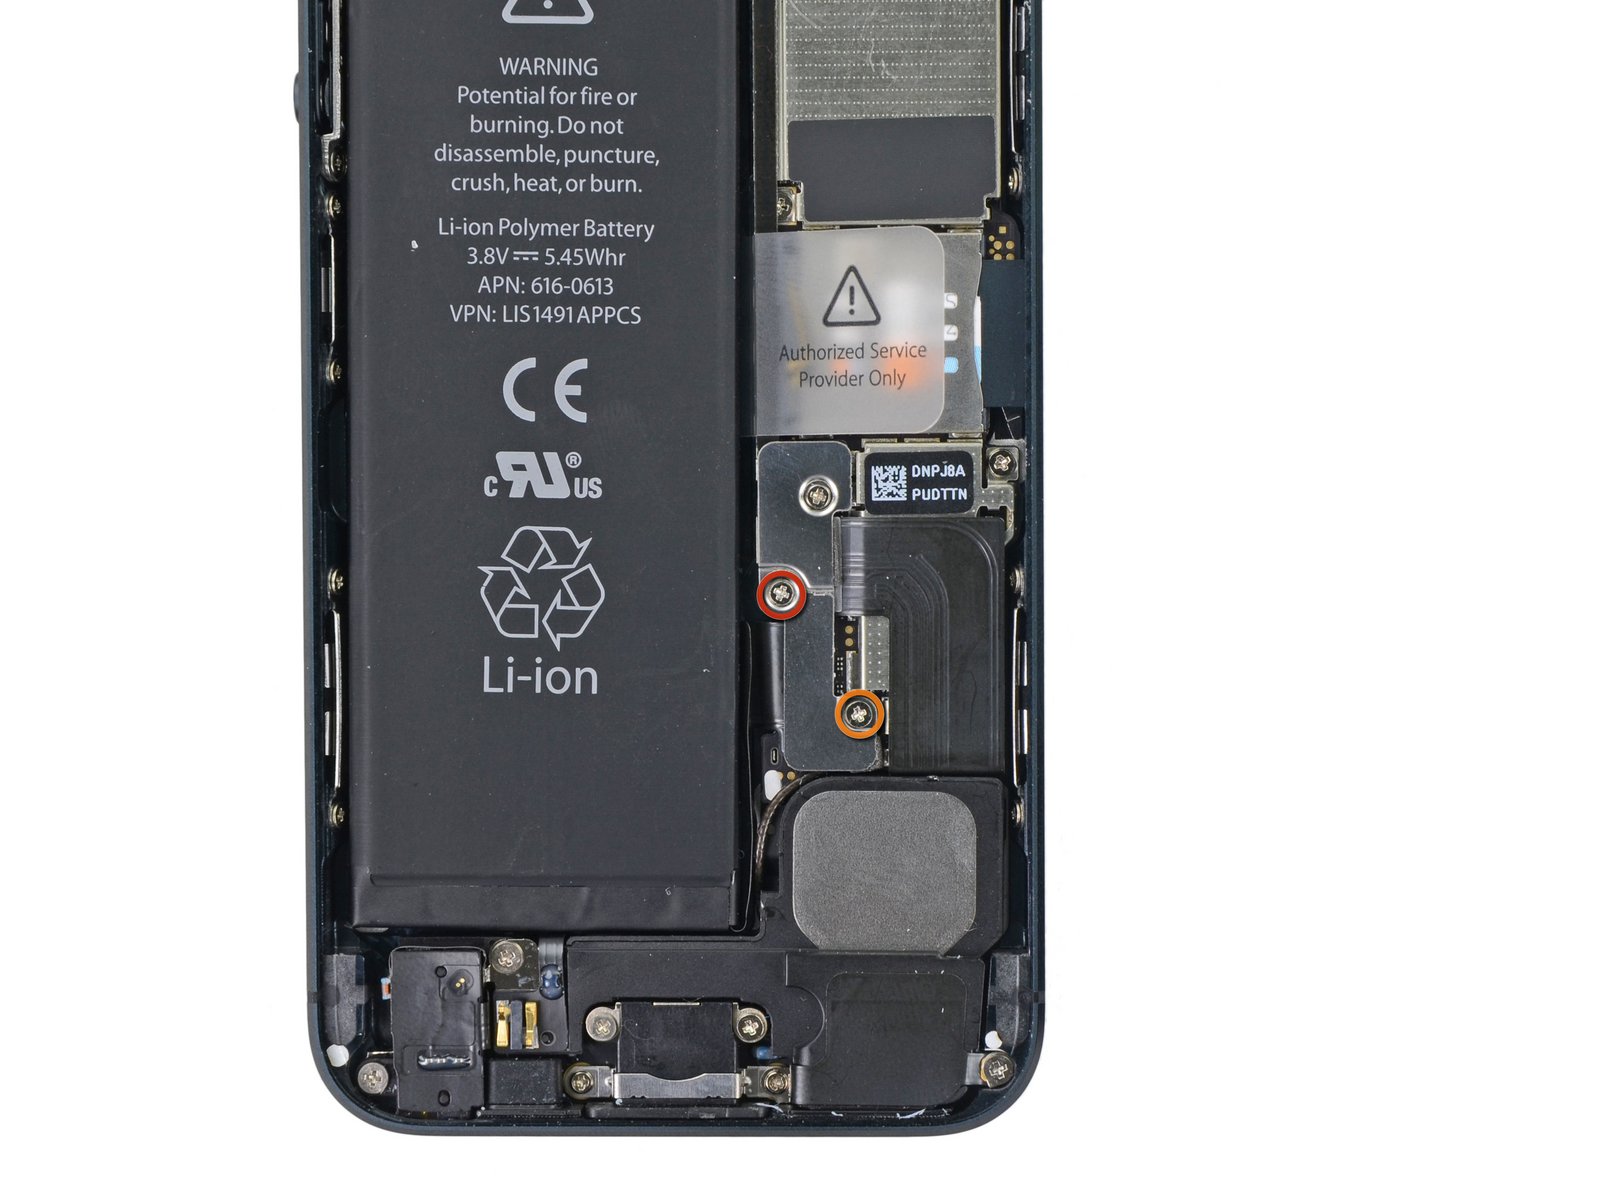 Remove the following two screws securing the metal battery connector bracket to the logic board:
One 1.8 mm Phillips screw
One 1.6 mm Phillips screw
Spoiler for 11:
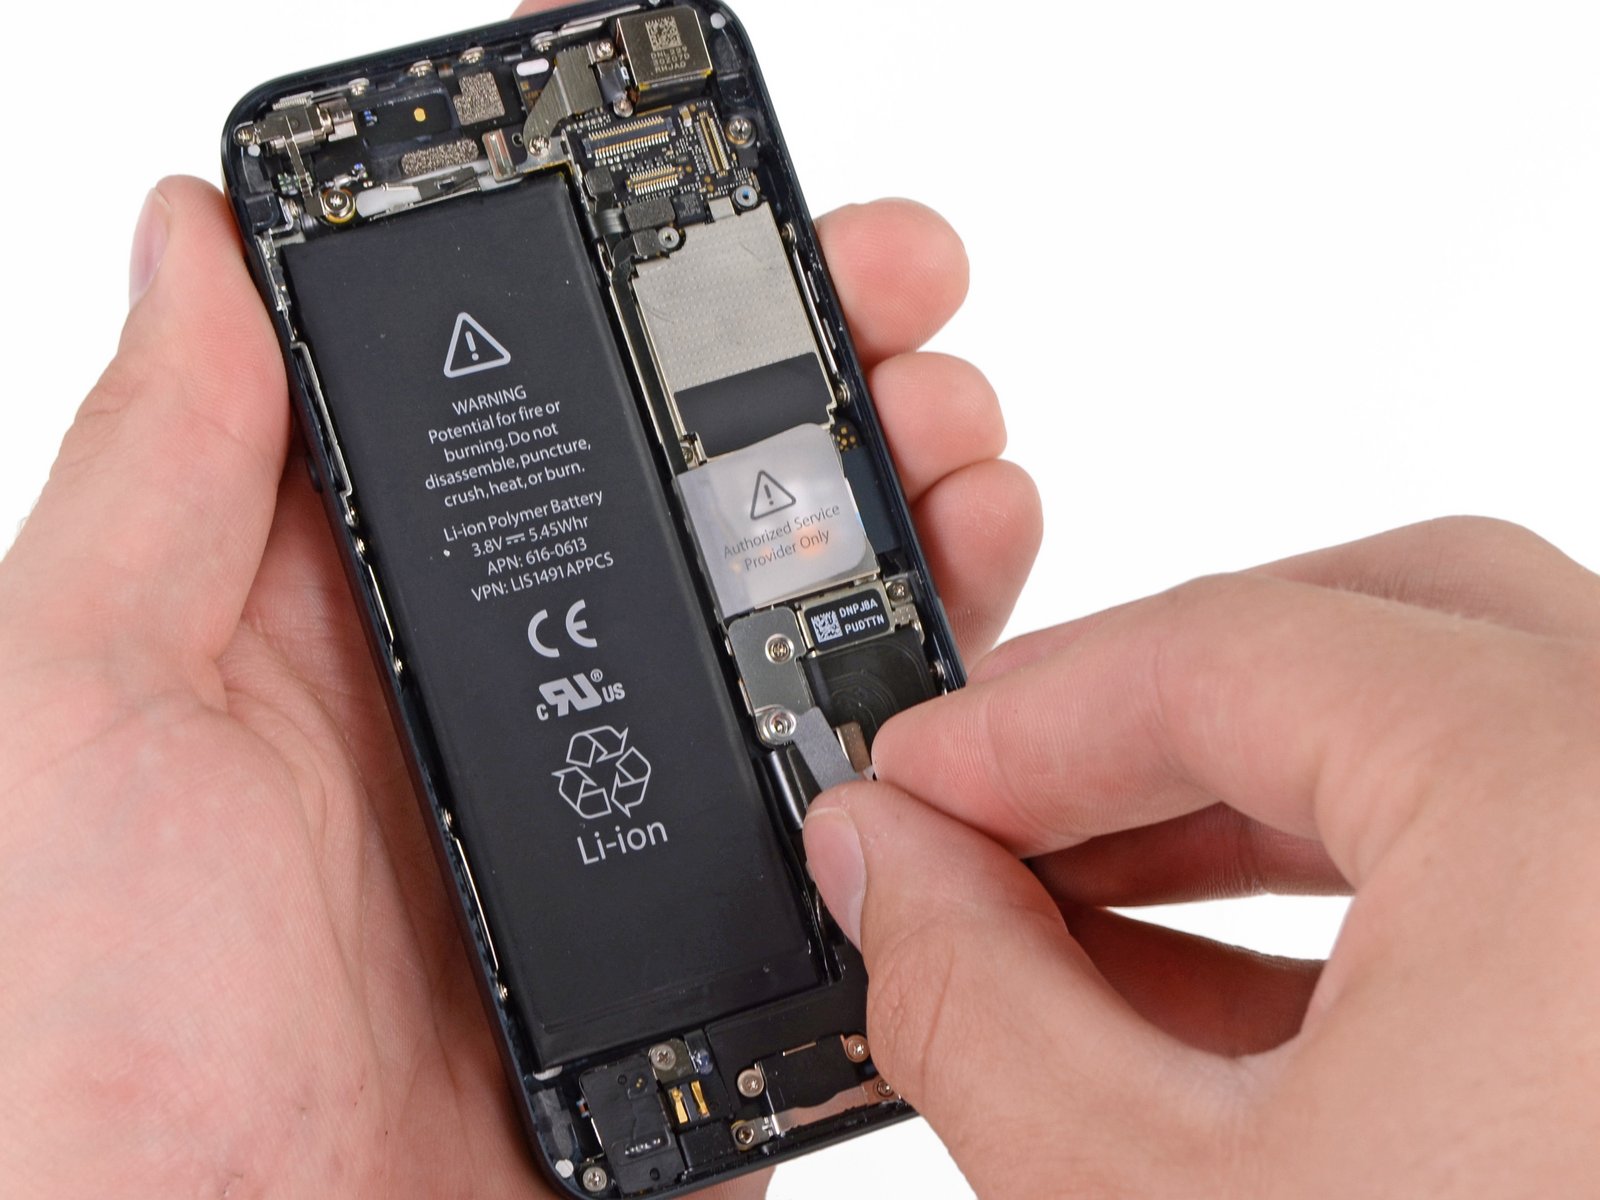 Remove the metal battery connector bracket from the iPhone.
Spoiler for 12:
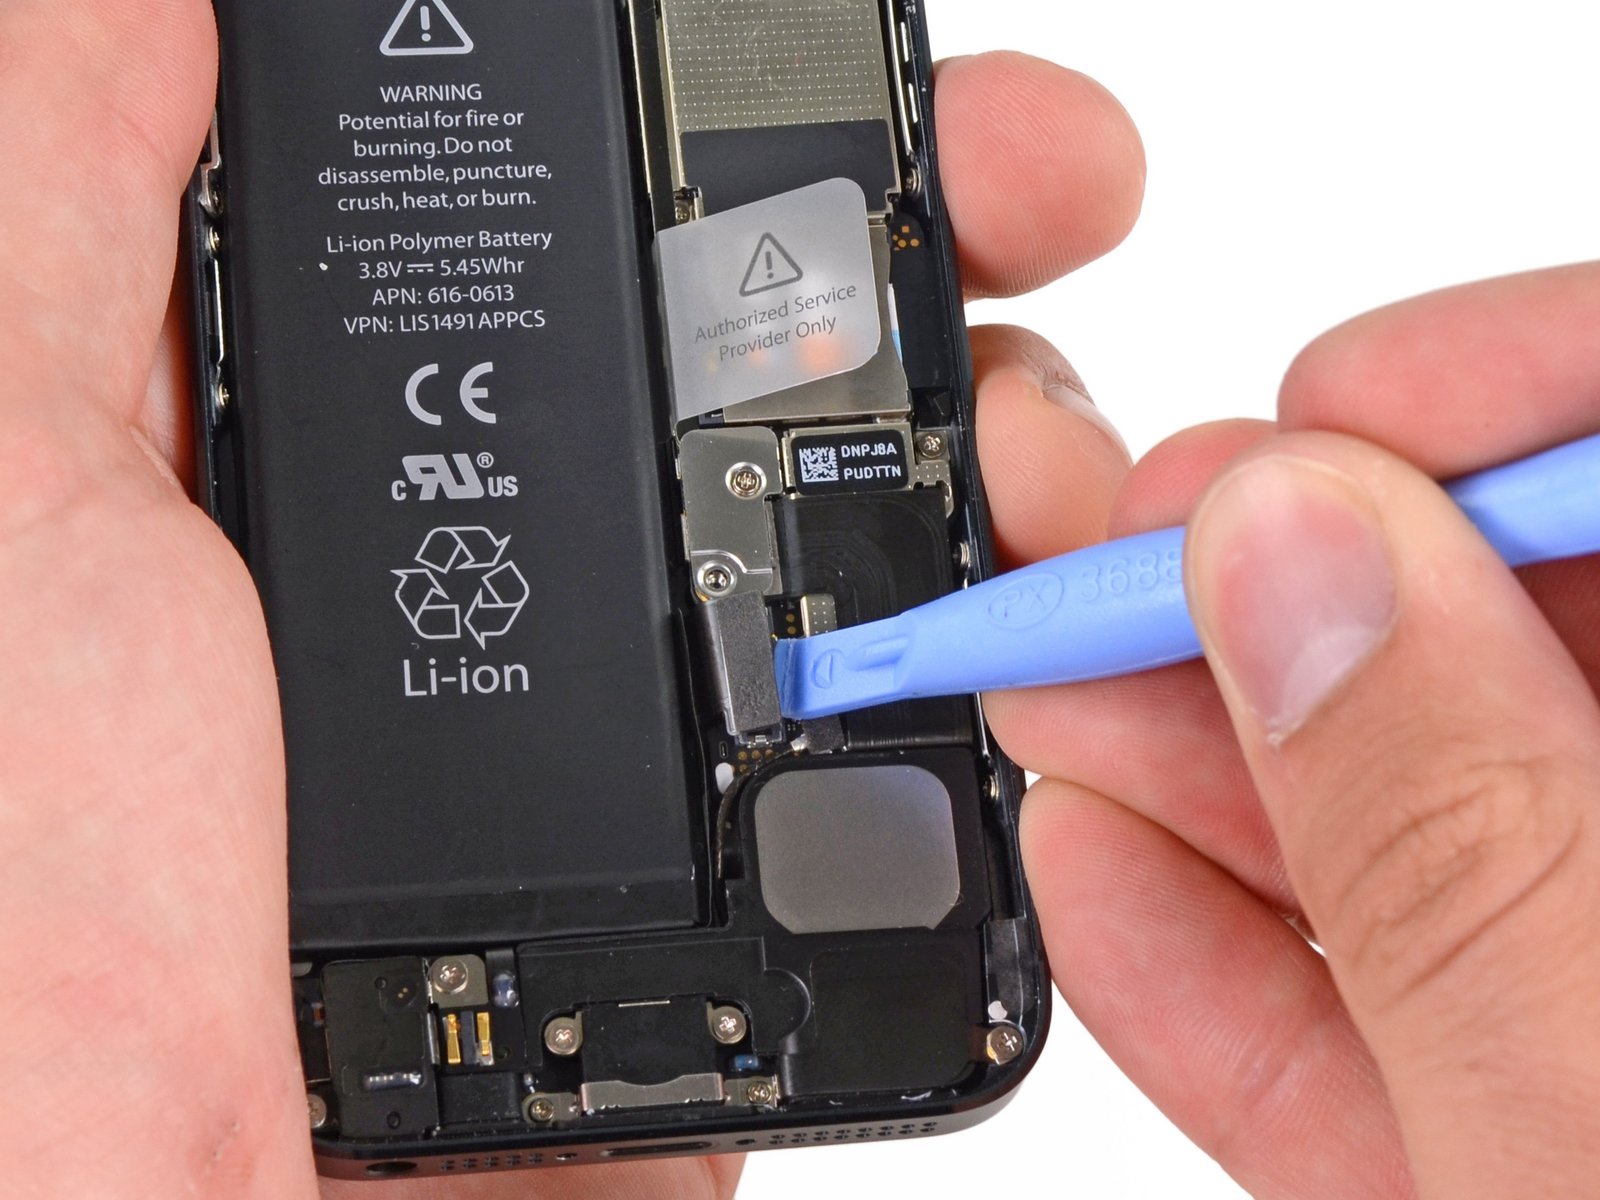 Use a plastic opening tool to gently pry the battery connector up from its socket on the logic board.
Be very careful to only pry up on the battery connector and not the socket on the logic board. If you pry up on the logic board socket, you may break the connector entirely.
]
Spoiler for 13:
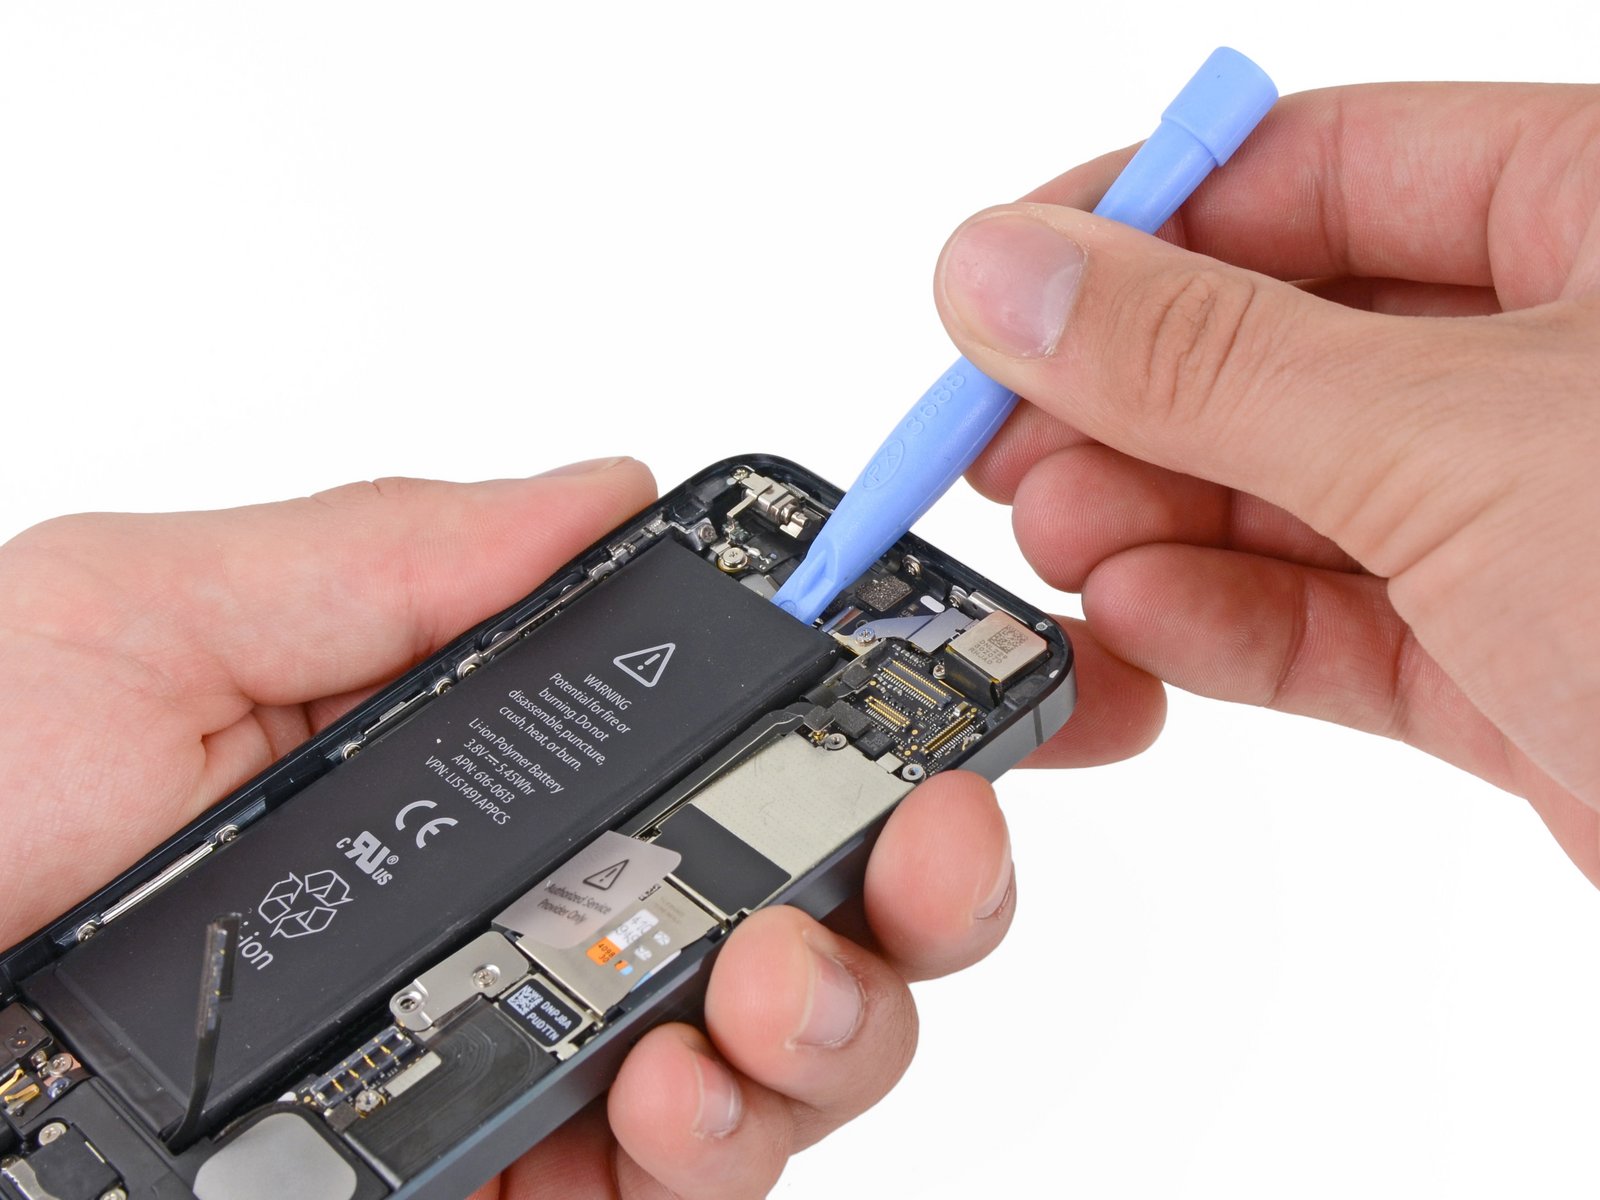 Insert the edge of a plastic opening tool between the battery and the rear case near the bottom the iPhone.
Run the plastic opening tool along the right edge of the battery and pry up at several points to completely separate it from the adhesive securing it to the rear case.
Do not pry up too hard, as this may permanently deform or puncture the battery or damage the logic board.
Spoiler for 14:
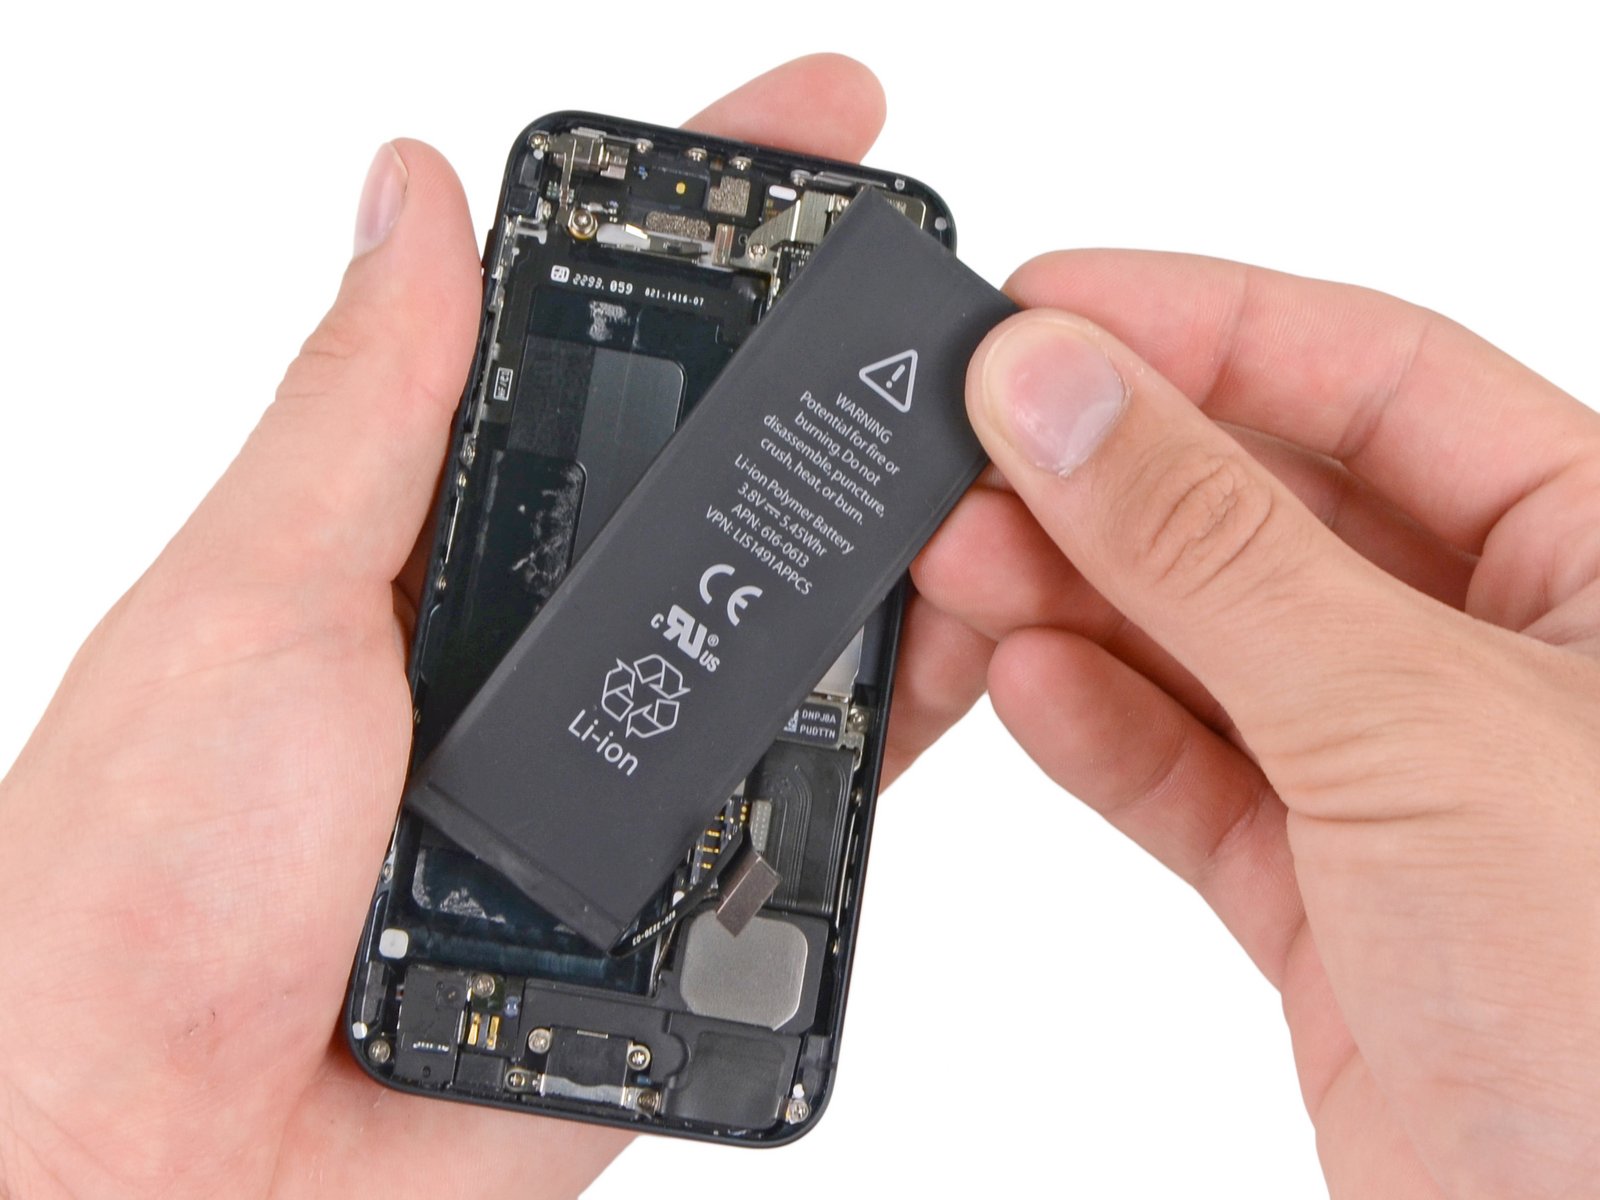 If necessary, use the exposed clear plastic pull tab to peel the battery off the adhesive securing it to the iPhone.
Remove the battery.
HARGAI TS DENGAN ;toast  yaaa
yaaa
yaaaSedikit dari TS
Lubang Buaya
NB:Artiin Sendiri aja bahasa inggrisnya

Diubah oleh ...admin...1 31-01-2014 06:07
0
3.2K
19

Guest
Tulis komentar menarik atau mention replykgpt untuk ngobrol seru
Mari bergabung, dapatkan informasi dan teman baru!
The Lounge
923.1KThread•83.3KAnggota
Terlama
Guest
Tulis komentar menarik atau mention replykgpt untuk ngobrol seru