- Beranda
- Linux dan OS Selain Microsoft & Mac
NEXTCLOUD APPS TALK (WEBRTC) DAN COLLABORA OFFICE
...
TS
realsifo777
NEXTCLOUD APPS TALK (WEBRTC) DAN COLLABORA OFFICE
CARA SEDERHANA MEMBUAT SERVER NEXTCLOUD DI GNU LINUX OS YANG SUPER AMAN ANTI SPY2 
=======================================================================================
Asslamualaikum
salam floss (free libre open source software) gnu linux
-----------------------------------
kali ini kita akan mencoba membuat server NEXTCLOUD sangat aman dari spy2 dengan gnu linux os
----------------------------
jangan lupa donasi ke sifo ok
===================================================
LATAR BELAKANG
seperti yang kita ketahui , jaman now bnyk media penyimpanan online (penyimpanan cloud) tapi sebagian besar dari apps ini itu spy2
artinya aplikasi ini dapat mencuri semua data2 kita dari komputer , laptop hp dll tanpa kita sadari dan dijual ke bandar data
-------------------------------
terus solusi dan mitigasinya gimana ?
-----------------------------
ya solusi dan mitigasi paling mudah ya buat / setting dunk media penyimpanan online (penyimpanan cloud) sendiri yang benar2 aman
mudah bgt kok dengan gnu linux os dan nextcloud
---------------------------------
================================
kelebihan nextcloud
1. floss (free libre open source software ) jadi aman, nyaman bebas merdeka
sangat cocok hotel, kantor, sekolah, kampus, wartawan , activis, agen rahasia dll yang butuh keamanan dan kenyamanan
2. sangat mudah diinstall, diseting dan digunakan di komputer lokal, komputer jaringan antar kantor, bahkan di internet lewat vps / dedicated server
=============================
alat dan bahan
1. komputer
a. 1 komputer untuk server
d. 2 komputer untuk client
-------------------------------
2. hp android
a. hp android ini bisa untuk cient
b. hp android ini bisa juga untuk wifi router / wifi theter
------------------------------------------------
3. wifi router yang bagus kalau perlu yang support openwrt biar mantap
=============================
4. koneksi internet untuk download software / apps dan update
==================
5. gnu linux os
aku rekomendasikan memakai av linux mx edition yang sangat stabil untuk dekstop maupun server segarang singa
aku juga sangat merekomendasikan kalau untuk komputer server aku rekomendasikan debian stable minimlis tanpa gui atau rocky linux minimlis tanpa gui biar tambah mantap
============================
6. nextcloud server
===============
7. apache2 web server, php.8.1
===============
8. web browser= firefox, chromium , falkon dll
============================
=================================
ok kita langsung aja mulai pada inti pembahasn cara sederhana menginstall nextcloud server
==============================
cara mudah dan sederhana install nextcloud server
-----------------------------------
----------------------------
------------
1. install gnu linux os di komputer server
aku rekomendasikan distro gnu linux = av linux mx edition
pakai distro gnu linux os lain juga bisa menyusuaikan
os lain nonfloss (os jendela, os buah) juga bisa tapi ga rekomendasi
jangan lupa konekan ke internet lewat wifi theter dari hp android / wifi router yang terhubung ke internet biar mudah
====================
2. install apache2 web server
apt install apache2 apache2-utils
===================
3. install php8.1 dan plugin2nya yang dibutuhkan nexcloud server
a. sudo update
b. sudo apt install -y lsb-release ca-certificates apt-transport-https software-
propertiesS E N S O Rmon wget unzip -y
d. echo "deb https://packages.sury.org/php/ $(lsb_release -sc) main" | sudo
tee /etc/apt/sources.list.d/sury-php.list
e. wget -qO - https://packages.sury.org/php/apt.gpg | sudo apt-key add -
g. sudo apt update
h, sudo apt full-upgrade
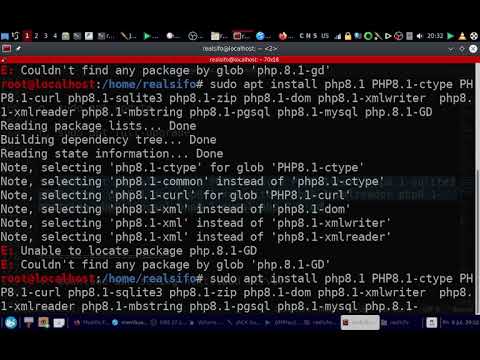
i. sudo apt install php8.1 PHP8.1-ctype PHP8.1-curl php8.1-sqlite3 php8.1-zip php8.1-dom php8.1-xmlwriter php8.1-xmlreader php8.1-mbstring php8.1-pgsql php8.1-mysql php8.1-gd
j. hidupkan modnya sudo a2enmod php8.1*
=====================
4. download dan seting nextcloud server
a. cd /tmp
b. wget https://download.nextcloud.com/serve...ses/latest.zip
c. masuk root
su
d. unzip lastest.zip
maka akan jadi folder nexcloud
e. pindahkan folder nextcloudku ke /var/www/html
mv nextcloud /var/www/html
f. cd /var/www/html
g. chmod -R 755 nextcloud
h. chown -R www-data:www-data nextcloud
i. kate /var/www/html/nextcloud/config/config.php8
edited trusted domaain tambahkan "*"
ini agar bisa diakses dijaringan lokal dll
============
5. atur / settinng apache2 web server nya
a. kate /etc/apache2/sites-available/nextcloud.conf
-------------------
<VirtualHost *:80>
ServerName nextcloud
ServerAdmin webmaster@nexcloud
DocumentRoot /var/www/html/nextcloud
<Directory /var/www/html/nextcloud>
Allowoverride all
</Directory>
</VirtualHost>
--------------------
b. a2ensite nextcloud.conf
---------------------------
c. systemctl restart apache2
===================================
7. seting nextcloudnya
a. buka dengan web browser (firefox, flakon, chromium , dll)
127.0.0.1/nexcloud
b. atur nama , pasword, data base pakai sqlite aja biar mudah
c. ok tunggu sampai selesai
d. kalau sudah selesai login dengan dengan username dan password yang kita buat tadi
e. nexcloud siap untuk digunakan
f. masuk file dan kita bisa upload , download , upload folder dengan drag and drop, install apps2 tambahan buat nexcloud server dll
==================================
nb
biar bisa upload file besar
1. kate /etc/php/8.1/apache2/php.ini
cari dan edit
upload_max_filesize = 900M
post_max_size = 900M
jangan lupa save dan tutup ok
2. sudo systemctl restart apache2
3. mantap dah
4.video tutorial biasa menyusul ok
===========================
============
==================
demikianlah tutor ini dibuat
bermanfaat insya Allah
mohon maaf jika ada yang kurang atau salah
sukses semua
amin ya Allah
=========================
jangan lupa yang ingin donasi ke sifo (anton wibowo)
BISA LEWAT DANA
088806190316
=======================
tulisan ini menggunakan lisensi floss full creative common (cc)
==============================
referensi
1. https://en.wikipedia.org/wiki/AV_Linux
2. https://en.wikipedia.org/wiki/Nextcloud
3. https://nextcloud.com/
==============================================
salam floss (free libre open source software) gnu linux
Wasalamualaikum
============================
NEXTCLOUD APPS TALK (WEBRTC) DAN COLLABORA OFFICE
=======================================================================================
Asslamualaikum
salam floss (free libre open source software) gnu linux
-----------------------------------
kali ini kita akan mencoba membuat server NEXTCLOUD sangat aman dari spy2 dengan gnu linux os
----------------------------
jangan lupa donasi ke sifo ok
===================================================
==============================
cara mudah dan sederhana install nextcloud server
-----------------------------------
----------------------------
------------
1. install gnu linux os di komputer server
aku rekomendasikan distro gnu linux = av linux mx edition
pakai distro gnu linux os lain juga bisa menyusuaikan
os lain nonfloss (os jendela, os buah) juga bisa tapi ga rekomendasi
jangan lupa konekan ke internet lewat wifi theter dari hp android / wifi router yang terhubung ke internet biar mudah
====================
2. install apache2 web server
sudo apt install apache2 apache2-utils
===================
3. install php8.1 dan plugin2nya yang dibutuhkan nexcloud server
a. sudo update
b. sudo apt install -y lsb-release ca-certificates apt-transport-https software-
propertiesS E N S O Rmon wget unzip -y
d. echo "deb https://packages.sury.org/php/ $(lsb_release -sc) main" | sudo
tee /etc/apt/sources.list.d/sury-php.list
e. wget -qO - https://packages.sury.org/php/apt.gpg | sudo apt-key add -
g. sudo apt update
h, sudo apt full-upgrade
i. sudo apt install php8.1 PHP8.1-ctype PHP8.1-curl php8.1-sqlite3 php8.1-zip php8.1-dom php8.1-xmlwriter php8.1-xmlreader php8.1-mbstring php8.1-pgsql php8.1-mysql php8.1-gd
j. hidupkan modnya sudo a2enmod php8.1*
=====================
4. download dan seting nextcloud server
a. cd /tmp
b. wget https://download.nextcloud.com/serve...ses/latest.zip
c. masuk root
su
d. unzip lastest.zip
maka akan jadi folder nexcloud
e. pindahkan folder nextcloudku ke /var/www/html
mv nextcloud /var/www/html
f. cd /var/www/html
g. chmod -R 755 nextcloud
h. chown -R www-data:www-data nextcloud
i. kate /var/www/html/nextcloud/config/config.php8
edited trusted domain tambahkan "*"
ini agar bisa diakses dijaringan lokal dll
============
5. atur / settinng apache2 web server nya
a. kate /etc/apache2/sites-available/nextcloud.conf
-------------------
<VirtualHost *:8080>
ServerName nextcloud
ServerAdmin webmaster@nexcloud
DocumentRoot /var/www/html/
<Directory /var/www/html/nextcloud>
Allowoverride all
</Directory>
</VirtualHost>
--------------------
b. a2ensite nextcloud.conf
---------------------------
c. systemctl restart apache2
===================================
7. seting nextcloudnya
a. buka dengan web browser (firefox, flakon, chromium , dll)
127.0.0.1/nexcloud
b. atur nama , pasword, data base pakai sqlite aja biar mudah
c. ok tunggu sampai selesai
d. kalau sudah selesai login dengan dengan username dan password yang kita buat tadi
e. nexcloud siap untuk digunakan
f. masuk file dan kita bisa upload , download , upload folder dengan drag and drop, install apps2 tambahan buat nexcloud server dll
==================================
nb
biar bisa upload file besar
1. kate /etc/php/8.1/apache2/php.ini
cari dan edit
-------------------
upload_max_filesize = 900M
post_max_size = 900M
memory_limit = 9000 G
-------------------------
jangan lupa save dan tutup ok
2. sudo systemctl restart apache2
===========================
============
==================
CARA MENGINSTALL DAN MENSETING APACHE DAN NGINX MENGGUNAKAN SSL
1. edit port apache2
# nano /etc/apache2/ports.conf [On Debian/Ubuntu]
# nano /etc/httpd/conf/httpd.conf [On RHEL/CentOS]
Listen 8080
=================================
2. untuk install cert dengan certbot
a. install certboot
sudo apt install certbot -y
----------------------
b. masuk ke /etc/letsencrypt/live/
cd /etc/letsencrypt/live/
==============
buat folder localhost di /etc/letsencrypt/live/
mkdir localhost
===================
c. buat lokalhost cert dengn certbot
harus di /etc/letsencrypt/live/localhost biar mudah
******************
openssl req -x509 -out localhost.crt -keyout localhost.key \
-newkey rsa:2048 -nodes -sha256 \
-subj '/CN=localhost' -extensions EXT -config <( \
printf "[dn]\nCN=localhost\n[req]\ndistinguished_name = dn\n[EXT]\nsubjectAltName=DNS:localhost\nkeyUsage=digitalSignature\nextendedKeyUsage=serverAuth")
**************************
openssl genrsa > privkey.pem
openssl req -new -x509 -key privkey.pem > fullchain.pem
===========================
kemudian
ls -lah /etc/letsencrypt/live/localhost/
=====================
3. install nginx
sudo apt install nginx -y
==============
4. setting nginx
nano /etc/nginx/sites-available/matrix
atau
kate /etc/nginx/sites-available/matrix
kemudian masukan kode berikut ini
*********************
server {
listen 447 ssl;
server_name localhost;
ssl_certificate /etc/letsencrypt/live/localhost/localhost.crt;
ssl_certificate_key /etc/letsencrypt/live/localhost/localhost.key;
location ~ {
proxy_pass [url]http://127.0.0.1:8008;[/url]
proxy_set_header X-Forwarded-For $remote_addr;
# Nginx by default only allows file uploads up to 1M in size
# Increase client_max_body_size to match max_upload_size defined in homeserver.yaml
client_max_body_size 900M;
}
}
# This is used for Matrix Federation
# which is using default TCP port '8448'
server {
listen 8448 ssl;
server_name localhost;
ssl_certificate /etc/letsencrypt/live/localhost/localhost.crt;
ssl_certificate_key /etc/letsencrypt/live/localhost/localhost.key;
location ~ {
proxy_pass [url]http://127.0.0.1:2083;[/url]
proxy_set_header X-Forwarded-For $remote_addr;
}
}
server {
listen 448 ssl;
server_name localhost;
ssl_certificate /etc/letsencrypt/live/localhost/localhost.crt;
ssl_certificate_key /etc/letsencrypt/live/localhost/localhost.key;
location ~ {
proxy_pass [url]http://127.0.0.1:2082;[/url]
proxy_set_header X-Forwarded-For $remote_addr;
}
}
server {
listen 449 ssl;
server_name localhost;
ssl_certificate /etc/letsencrypt/live/localhost/localhost.crt;
ssl_certificate_key /etc/letsencrypt/live/localhost/localhost.key;
location ~ {
proxy_pass [url]http://127.0.0.1:80;[/url]
proxy_set_header X-Forwarded-For $remote_addr;
}
}
server {
listen 442 ssl;
server_name localhost;
ssl_certificate /etc/letsencrypt/live/localhost/localhost.crt;
ssl_certificate_key /etc/letsencrypt/live/localhost/localhost.key;
location ~ {
proxy_pass [url]http://127.0.0.1:8080;[/url]
proxy_set_header X-Forwarded-For $remote_addr;
}
}
server {
listen 192.168.43.97:9999 ssl;
server_name localhost;
ssl_certificate /etc/letsencrypt/live/localhost/localhost.crt;
ssl_certificate_key /etc/letsencrypt/live/localhost/localhost.key;
location / {
proxy_pass http://192.168.43.97:8080/;
root /usr/share/nginx/html;
proxy_redirect off;
proxy_set_header X-Forwarded-Host $host;
proxy_set_header X-Forwarded-Server $host;
proxy_set_header X-Real-IP $remote_addr;
proxy_set_header X-Forwarded-For $proxy_add_x_forwarded_for;
}
}
********************************************
lalu
ln -s /etc/nginx/sites-available/matrix /etc/nginx/sites-enabled/
=====================
5. restart nginx
sudo systemctl restart nginx
sudo systemctl enable nginx
================
=======
6. restart apache2 dan nginx
sudo systemctl restart apache2
sudo systemctl restart nginx
=================================
7. buka nexcloud di web browser
https://192.168.43.97:9999
==============
8. login
============
9. masuk nextcloud apps store
================
10. kita install registration, talk , nextcloud office , collabora office build in
cd /var/www/html/nextcloud
--------------------------------------------------------------------
a. registration
sudo -u www-data php -d memory_limit=512M ./occ app:install registration
setelah diinstall lebih baik matikan verifikasi email di setting
kita bisa mendaftar di menu utama
maukan email , stelah itu username dan password, terus login
--------------------------
b. nexcloud office dan Collabora Online - Built-in CODE Server
sudo -u www-data php -d memory_limit=512M ./occ app:install richdocuments
sudo -u www-data php -d memory_limit=512M ./occ app:install richdocumentscode
---------------------
c. talk
sudo -u www-data php -d memory_limit=512M ./occ app:install spreed
--------------
d. update all nextcloud apps
sudo -u www-data php -d memory_limit=512M ./occ app:update --all
============================
11. nexcloud office /Collabora Online - Built-in CODE Server
ini adalah aplikasi mirip office online
cara setting
a. masuk ke setting
b. pilih nextcloud office administartion
c. pilih Collabora Online - Built-in CODE Server
==========================
cara membuat / membuka dokumen office baru
a. masuk ke file
b. tambahkan / upload / buka file doc, spread sheet , presentation
==============
12. kita masuk ke talk / web chat / web rtc
pilih talk
untuk vcall /video conference harus https
https://192.168.43.97:9999/nextcloud...p/apps/spreed/
================================
demikianlah tutor ini dibuat
bermanfaat insya Allah
mohon maaf jika ada yang kurang atau salah
sukses semua
amin ya Allah
=========================
jangan lupa yang ingin donasi ke sifo (anton wibowo)
BISA LEWAT DANA
088806190316
=======================
tulisan ini menggunakan lisensi floss full creative common (cc)
==============================
referensi
1. https://en.wikipedia.org/wiki/AV_Linux
2. https://en.wikipedia.org/wiki/Nextcloud
3. https://nextcloud.com/
4. https://apps.nextcloud.com/apps/richdocumentscode
5. https://apps.nextcloud.com/apps/spreed
6. https://apps.nextcloud.com/apps/registration
==============================================
salam floss (free libre open source software) gnu linux
Wasalamualaikum
============================
=============
tambahan
1. bloku
a. [url]https://blogblogflossmania.pythonanywhere.com [/url]
b. https://tutorial-gnu-linux-sifo.blogspot.com/
========================
video tutor mebuat nextcloud sederhana di gnu linux
==========================================
=====================================
=======================================================================================
Asslamualaikum
salam floss (free libre open source software) gnu linux
-----------------------------------
kali ini kita akan mencoba membuat server NEXTCLOUD sangat aman dari spy2 dengan gnu linux os
----------------------------
jangan lupa donasi ke sifo ok
===================================================
LATAR BELAKANG
seperti yang kita ketahui , jaman now bnyk media penyimpanan online (penyimpanan cloud) tapi sebagian besar dari apps ini itu spy2
artinya aplikasi ini dapat mencuri semua data2 kita dari komputer , laptop hp dll tanpa kita sadari dan dijual ke bandar data
-------------------------------
terus solusi dan mitigasinya gimana ?
-----------------------------
ya solusi dan mitigasi paling mudah ya buat / setting dunk media penyimpanan online (penyimpanan cloud) sendiri yang benar2 aman
mudah bgt kok dengan gnu linux os dan nextcloud
---------------------------------
================================
kelebihan nextcloud
1. floss (free libre open source software ) jadi aman, nyaman bebas merdeka
sangat cocok hotel, kantor, sekolah, kampus, wartawan , activis, agen rahasia dll yang butuh keamanan dan kenyamanan
2. sangat mudah diinstall, diseting dan digunakan di komputer lokal, komputer jaringan antar kantor, bahkan di internet lewat vps / dedicated server
=============================
alat dan bahan
1. komputer
a. 1 komputer untuk server
d. 2 komputer untuk client
-------------------------------
2. hp android
a. hp android ini bisa untuk cient
b. hp android ini bisa juga untuk wifi router / wifi theter
------------------------------------------------
3. wifi router yang bagus kalau perlu yang support openwrt biar mantap
=============================
4. koneksi internet untuk download software / apps dan update
==================
5. gnu linux os
aku rekomendasikan memakai av linux mx edition yang sangat stabil untuk dekstop maupun server
segarang singa aku juga sangat merekomendasikan kalau untuk komputer server aku rekomendasikan debian stable minimlis tanpa gui atau rocky linux minimlis tanpa gui biar tambah mantap
============================
6. nextcloud server
===============
7. apache2 web server, php.8.1
===============
8. web browser= firefox, chromium , falkon dll
============================
=================================
ok kita langsung aja mulai pada inti pembahasn cara sederhana menginstall nextcloud server
==============================
cara mudah dan sederhana install nextcloud server
-----------------------------------
----------------------------
------------
1. install gnu linux os di komputer server
aku rekomendasikan distro gnu linux = av linux mx edition
pakai distro gnu linux os lain juga bisa menyusuaikan
os lain nonfloss (os jendela, os buah) juga bisa tapi ga rekomendasi
jangan lupa konekan ke internet lewat wifi theter dari hp android / wifi router yang terhubung ke internet biar mudah
====================
2. install apache2 web server
apt install apache2 apache2-utils
===================
3. install php8.1 dan plugin2nya yang dibutuhkan nexcloud server
a. sudo update
b. sudo apt install -y lsb-release ca-certificates apt-transport-https software-
propertiesS E N S O Rmon wget unzip -y
d. echo "deb https://packages.sury.org/php/ $(lsb_release -sc) main" | sudo
tee /etc/apt/sources.list.d/sury-php.list
e. wget -qO - https://packages.sury.org/php/apt.gpg | sudo apt-key add -
g. sudo apt update
h, sudo apt full-upgrade
i. sudo apt install php8.1 PHP8.1-ctype PHP8.1-curl php8.1-sqlite3 php8.1-zip php8.1-dom php8.1-xmlwriter php8.1-xmlreader php8.1-mbstring php8.1-pgsql php8.1-mysql php8.1-gd
j. hidupkan modnya sudo a2enmod php8.1*
=====================
4. download dan seting nextcloud server
a. cd /tmp
b. wget https://download.nextcloud.com/serve...ses/latest.zip
c. masuk root
su
d. unzip lastest.zip
maka akan jadi folder nexcloud
e. pindahkan folder nextcloudku ke /var/www/html
mv nextcloud /var/www/html
f. cd /var/www/html
g. chmod -R 755 nextcloud
h. chown -R www-data:www-data nextcloud
i. kate /var/www/html/nextcloud/config/config.php8
edited trusted domaain tambahkan "*"
ini agar bisa diakses dijaringan lokal dll
============
5. atur / settinng apache2 web server nya
a. kate /etc/apache2/sites-available/nextcloud.conf
-------------------
<VirtualHost *:80>
ServerName nextcloud
ServerAdmin webmaster@nexcloud
DocumentRoot /var/www/html/nextcloud
<Directory /var/www/html/nextcloud>
Allowoverride all
</Directory>
</VirtualHost>
--------------------
b. a2ensite nextcloud.conf
---------------------------
c. systemctl restart apache2
===================================
7. seting nextcloudnya
a. buka dengan web browser (firefox, flakon, chromium , dll)
127.0.0.1/nexcloud
b. atur nama , pasword, data base pakai sqlite aja biar mudah
c. ok tunggu sampai selesai
d. kalau sudah selesai login dengan dengan username dan password yang kita buat tadi
e. nexcloud siap untuk digunakan
f. masuk file dan kita bisa upload , download , upload folder dengan drag and drop, install apps2 tambahan buat nexcloud server dll
==================================
nb
biar bisa upload file besar
1. kate /etc/php/8.1/apache2/php.ini
cari dan edit
upload_max_filesize = 900M
post_max_size = 900M
jangan lupa save dan tutup ok
2. sudo systemctl restart apache2
3. mantap dah
4.video tutorial biasa menyusul ok
===========================
============
==================
demikianlah tutor ini dibuat
bermanfaat insya Allah
mohon maaf jika ada yang kurang atau salah
sukses semua
amin ya Allah
=========================
jangan lupa yang ingin donasi ke sifo (anton wibowo)
BISA LEWAT DANA
088806190316
=======================
tulisan ini menggunakan lisensi floss full creative common (cc)
==============================
referensi
1. https://en.wikipedia.org/wiki/AV_Linux
2. https://en.wikipedia.org/wiki/Nextcloud
3. https://nextcloud.com/
==============================================
salam floss (free libre open source software) gnu linux
Wasalamualaikum
============================
NEXTCLOUD APPS TALK (WEBRTC) DAN COLLABORA OFFICE
=======================================================================================
Asslamualaikum
salam floss (free libre open source software) gnu linux
-----------------------------------
kali ini kita akan mencoba membuat server NEXTCLOUD sangat aman dari spy2 dengan gnu linux os
----------------------------
jangan lupa donasi ke sifo ok
===================================================
==============================
cara mudah dan sederhana install nextcloud server
-----------------------------------
----------------------------
------------
1. install gnu linux os di komputer server
aku rekomendasikan distro gnu linux = av linux mx edition
pakai distro gnu linux os lain juga bisa menyusuaikan
os lain nonfloss (os jendela, os buah) juga bisa tapi ga rekomendasi
jangan lupa konekan ke internet lewat wifi theter dari hp android / wifi router yang terhubung ke internet biar mudah
====================
2. install apache2 web server
sudo apt install apache2 apache2-utils
===================
3. install php8.1 dan plugin2nya yang dibutuhkan nexcloud server
a. sudo update
b. sudo apt install -y lsb-release ca-certificates apt-transport-https software-
propertiesS E N S O Rmon wget unzip -y
d. echo "deb https://packages.sury.org/php/ $(lsb_release -sc) main" | sudo
tee /etc/apt/sources.list.d/sury-php.list
e. wget -qO - https://packages.sury.org/php/apt.gpg | sudo apt-key add -
g. sudo apt update
h, sudo apt full-upgrade
i. sudo apt install php8.1 PHP8.1-ctype PHP8.1-curl php8.1-sqlite3 php8.1-zip php8.1-dom php8.1-xmlwriter php8.1-xmlreader php8.1-mbstring php8.1-pgsql php8.1-mysql php8.1-gd
j. hidupkan modnya sudo a2enmod php8.1*
=====================
4. download dan seting nextcloud server
a. cd /tmp
b. wget https://download.nextcloud.com/serve...ses/latest.zip
c. masuk root
su
d. unzip lastest.zip
maka akan jadi folder nexcloud
e. pindahkan folder nextcloudku ke /var/www/html
mv nextcloud /var/www/html
f. cd /var/www/html
g. chmod -R 755 nextcloud
h. chown -R www-data:www-data nextcloud
i. kate /var/www/html/nextcloud/config/config.php8
edited trusted domain tambahkan "*"
ini agar bisa diakses dijaringan lokal dll
============
5. atur / settinng apache2 web server nya
a. kate /etc/apache2/sites-available/nextcloud.conf
-------------------
<VirtualHost *:8080>
ServerName nextcloud
ServerAdmin webmaster@nexcloud
DocumentRoot /var/www/html/
<Directory /var/www/html/nextcloud>
Allowoverride all
</Directory>
</VirtualHost>
--------------------
b. a2ensite nextcloud.conf
---------------------------
c. systemctl restart apache2
===================================
7. seting nextcloudnya
a. buka dengan web browser (firefox, flakon, chromium , dll)
127.0.0.1/nexcloud
b. atur nama , pasword, data base pakai sqlite aja biar mudah
c. ok tunggu sampai selesai
d. kalau sudah selesai login dengan dengan username dan password yang kita buat tadi
e. nexcloud siap untuk digunakan
f. masuk file dan kita bisa upload , download , upload folder dengan drag and drop, install apps2 tambahan buat nexcloud server dll
==================================
nb
biar bisa upload file besar
1. kate /etc/php/8.1/apache2/php.ini
cari dan edit
-------------------
upload_max_filesize = 900M
post_max_size = 900M
memory_limit = 9000 G
-------------------------
jangan lupa save dan tutup ok
2. sudo systemctl restart apache2
===========================
============
==================
CARA MENGINSTALL DAN MENSETING APACHE DAN NGINX MENGGUNAKAN SSL
1. edit port apache2
# nano /etc/apache2/ports.conf [On Debian/Ubuntu]
# nano /etc/httpd/conf/httpd.conf [On RHEL/CentOS]
Listen 8080
=================================
2. untuk install cert dengan certbot
a. install certboot
sudo apt install certbot -y
----------------------
b. masuk ke /etc/letsencrypt/live/
cd /etc/letsencrypt/live/
==============
buat folder localhost di /etc/letsencrypt/live/
mkdir localhost
===================
c. buat lokalhost cert dengn certbot
harus di /etc/letsencrypt/live/localhost biar mudah
******************
openssl req -x509 -out localhost.crt -keyout localhost.key \
-newkey rsa:2048 -nodes -sha256 \
-subj '/CN=localhost' -extensions EXT -config <( \
printf "[dn]\nCN=localhost\n[req]\ndistinguished_name = dn\n[EXT]\nsubjectAltName=DNS:localhost\nkeyUsage=digitalSignature\nextendedKeyUsage=serverAuth")
**************************
openssl genrsa > privkey.pem
openssl req -new -x509 -key privkey.pem > fullchain.pem
===========================
kemudian
ls -lah /etc/letsencrypt/live/localhost/
=====================
3. install nginx
sudo apt install nginx -y
==============
4. setting nginx
nano /etc/nginx/sites-available/matrix
atau
kate /etc/nginx/sites-available/matrix
kemudian masukan kode berikut ini
*********************
server {
listen 447 ssl;
server_name localhost;
ssl_certificate /etc/letsencrypt/live/localhost/localhost.crt;
ssl_certificate_key /etc/letsencrypt/live/localhost/localhost.key;
location ~ {
proxy_pass [url]http://127.0.0.1:8008;[/url]
proxy_set_header X-Forwarded-For $remote_addr;
# Nginx by default only allows file uploads up to 1M in size
# Increase client_max_body_size to match max_upload_size defined in homeserver.yaml
client_max_body_size 900M;
}
}
# This is used for Matrix Federation
# which is using default TCP port '8448'
server {
listen 8448 ssl;
server_name localhost;
ssl_certificate /etc/letsencrypt/live/localhost/localhost.crt;
ssl_certificate_key /etc/letsencrypt/live/localhost/localhost.key;
location ~ {
proxy_pass [url]http://127.0.0.1:2083;[/url]
proxy_set_header X-Forwarded-For $remote_addr;
}
}
server {
listen 448 ssl;
server_name localhost;
ssl_certificate /etc/letsencrypt/live/localhost/localhost.crt;
ssl_certificate_key /etc/letsencrypt/live/localhost/localhost.key;
location ~ {
proxy_pass [url]http://127.0.0.1:2082;[/url]
proxy_set_header X-Forwarded-For $remote_addr;
}
}
server {
listen 449 ssl;
server_name localhost;
ssl_certificate /etc/letsencrypt/live/localhost/localhost.crt;
ssl_certificate_key /etc/letsencrypt/live/localhost/localhost.key;
location ~ {
proxy_pass [url]http://127.0.0.1:80;[/url]
proxy_set_header X-Forwarded-For $remote_addr;
}
}
server {
listen 442 ssl;
server_name localhost;
ssl_certificate /etc/letsencrypt/live/localhost/localhost.crt;
ssl_certificate_key /etc/letsencrypt/live/localhost/localhost.key;
location ~ {
proxy_pass [url]http://127.0.0.1:8080;[/url]
proxy_set_header X-Forwarded-For $remote_addr;
}
}
server {
listen 192.168.43.97:9999 ssl;
server_name localhost;
ssl_certificate /etc/letsencrypt/live/localhost/localhost.crt;
ssl_certificate_key /etc/letsencrypt/live/localhost/localhost.key;
location / {
proxy_pass http://192.168.43.97:8080/;
root /usr/share/nginx/html;
proxy_redirect off;
proxy_set_header X-Forwarded-Host $host;
proxy_set_header X-Forwarded-Server $host;
proxy_set_header X-Real-IP $remote_addr;
proxy_set_header X-Forwarded-For $proxy_add_x_forwarded_for;
}
}
********************************************
lalu
ln -s /etc/nginx/sites-available/matrix /etc/nginx/sites-enabled/
=====================
5. restart nginx
sudo systemctl restart nginx
sudo systemctl enable nginx
================
=======
6. restart apache2 dan nginx
sudo systemctl restart apache2
sudo systemctl restart nginx
=================================
7. buka nexcloud di web browser
https://192.168.43.97:9999
==============
8. login
============
9. masuk nextcloud apps store
================
10. kita install registration, talk , nextcloud office , collabora office build in
cd /var/www/html/nextcloud
--------------------------------------------------------------------
a. registration
sudo -u www-data php -d memory_limit=512M ./occ app:install registration
setelah diinstall lebih baik matikan verifikasi email di setting
kita bisa mendaftar di menu utama
maukan email , stelah itu username dan password, terus login
--------------------------
b. nexcloud office dan Collabora Online - Built-in CODE Server
sudo -u www-data php -d memory_limit=512M ./occ app:install richdocuments
sudo -u www-data php -d memory_limit=512M ./occ app:install richdocumentscode
---------------------
c. talk
sudo -u www-data php -d memory_limit=512M ./occ app:install spreed
--------------
d. update all nextcloud apps
sudo -u www-data php -d memory_limit=512M ./occ app:update --all
============================
11. nexcloud office /Collabora Online - Built-in CODE Server
ini adalah aplikasi mirip office online
cara setting
a. masuk ke setting
b. pilih nextcloud office administartion
c. pilih Collabora Online - Built-in CODE Server
==========================
cara membuat / membuka dokumen office baru
a. masuk ke file
b. tambahkan / upload / buka file doc, spread sheet , presentation
==============
12. kita masuk ke talk / web chat / web rtc
pilih talk
untuk vcall /video conference harus https
https://192.168.43.97:9999/nextcloud...p/apps/spreed/
================================
demikianlah tutor ini dibuat
bermanfaat insya Allah
mohon maaf jika ada yang kurang atau salah
sukses semua
amin ya Allah
=========================
jangan lupa yang ingin donasi ke sifo (anton wibowo)
BISA LEWAT DANA
088806190316
=======================
tulisan ini menggunakan lisensi floss full creative common (cc)
==============================
referensi
1. https://en.wikipedia.org/wiki/AV_Linux
2. https://en.wikipedia.org/wiki/Nextcloud
3. https://nextcloud.com/
4. https://apps.nextcloud.com/apps/richdocumentscode
5. https://apps.nextcloud.com/apps/spreed
6. https://apps.nextcloud.com/apps/registration
==============================================
salam floss (free libre open source software) gnu linux
Wasalamualaikum
============================
=============
tambahan
1. bloku
a. [url]https://blogblogflossmania.pythonanywhere.com [/url]
b. https://tutorial-gnu-linux-sifo.blogspot.com/
========================
video tutor mebuat nextcloud sederhana di gnu linux
==========================================
=====================================
Diubah oleh realsifo777 17-07-2022 03:24
0
413
1

Guest
Tulis komentar menarik atau mention replykgpt untuk ngobrol seru
Mari bergabung, dapatkan informasi dan teman baru!
Linux dan OS Selain Microsoft & Mac
4.4KThread•2KAnggota
Terlama
Guest
Tulis komentar menarik atau mention replykgpt untuk ngobrol seru